Hello stampers and crafters,
Thank so much for visiting my blog today. I had some fun this week making these cards. I love all the coffee stamp sets and sentiments that are available. They are so much fun to make and give to my friends and family. Dare 2B Artzy offers coffee and faith inspired stamp sets. I love combining the whimsy of coffee themed stamps with the seriousness of faith sentiments - such a great balance.
I used a classic color combination of browns and blues, embellishments and embossing. I really like using clear embossing powder to imitate steam and it gives a nice glossy texture to the stamped coffee cups.
These cards can be used for any occasion or sentiment - even to just put a smile on someone's face. I love sending these cards to my coffee loving friends.
I hope these cards give you some inspiration to make coffee themed cards. And you enjoy making them as much as I do.
These cards and more are available on my Etsy shop. They are available individually or as a set (best price).
Happy Stamping!
This is my passion - sharing stamping, paper crafting and card making techniques and creative ideas to help inspire your creativity.
Saturday, September 2, 2017
Saturday, August 19, 2017
Welcome Baby Cards
Hello stampers,
Several of my acquaintances have had babies in the last month. There are so many cute handmade baby cards out there but I don't have hardly any baby themed stamp sets. I made these card with stamps from "all occasion" stamp set.
The die cuts are what makes these cards extra special and precious. I'm only showing the pink version but the boy versions are just as beautiful. It's amazing what a little pink or blue cardstock die cut with a sweet sentiment will make.
On the first card, the foot print is embossed using light pink embossing powder and Versamark ink.
Both cards are available on my Etsy Shop, Handmade by Kathie K.
Happy stamping!
Several of my acquaintances have had babies in the last month. There are so many cute handmade baby cards out there but I don't have hardly any baby themed stamp sets. I made these card with stamps from "all occasion" stamp set.
The die cuts are what makes these cards extra special and precious. I'm only showing the pink version but the boy versions are just as beautiful. It's amazing what a little pink or blue cardstock die cut with a sweet sentiment will make.
On the first card, the foot print is embossed using light pink embossing powder and Versamark ink.
Both cards are available on my Etsy Shop, Handmade by Kathie K.
Happy stamping!
Sunday, August 13, 2017
Wedding Keepsake Card
Hello fellow stampers,
This next project, I have to admit, took a lot longer than I expected. However, once I figured out the design, the card came together very quickly and the time it took to plan was well worth it. I love how this wedding card turned out!
It's actually more than a card but a keepsake that could adorn the new couples home as a sweet memory of their very special day. Even though this card was completed as a wedding card, the same card could be used as an anniversary card, birthday card, or welcoming the new addition to the family.
Hopefully these step-by-step instructions will help you make this card very quickly. All of the supplies are listed below.
Starting from the base and working up.
This next project, I have to admit, took a lot longer than I expected. However, once I figured out the design, the card came together very quickly and the time it took to plan was well worth it. I love how this wedding card turned out!
It's actually more than a card but a keepsake that could adorn the new couples home as a sweet memory of their very special day. Even though this card was completed as a wedding card, the same card could be used as an anniversary card, birthday card, or welcoming the new addition to the family.
Hopefully these step-by-step instructions will help you make this card very quickly. All of the supplies are listed below.
Starting from the base and working up.
- Cut piece of white cardstock that measures 8 x 12, score on the 12" side at 6" and fold in half; set aside
- Cut a piece of white shimmer paper 8 x 6; using a score board make two score lines on each side to make a score line frame. Score at 1/8" and 2/8". Adhere to the white card base.
- Cut a piece of designer paper 5 1/4 x 7 1/4- in this card I used a piece from my stash just to add a soft touch of color but anything would work.
- Cut a piece of white shimmer paper 5 x 7 - this is the piece to die cut to make the lacy background. I used two separate dies to achieve this look - I die cut one half of the paper and then the other. Tip: mix and match your dies - I experimented a lot which was super fun and discovered a couple of lacy backgrounds that I really like. Using foam strips or other dimensional adhesive, attached the lacy background to the designer paper.
- For me doing all of the die cutting at once worked best. You will need an ornate frame die, ovals, and an embellishment piece. Again, any die will work - you are building a focal point. I added just a hint of silver using a scalloped oval cut in silver shimmer paper, standard oval die one size smaller cut in designer paper, scalloped oval die two sizes smaller in shimmer paper. I also cut a scalloped oval piece for the message inside the card. I prefer to stamp and emboss the sentiment or message first then line up the oval die. This worked best for me. Die cut the embellishment out of white shimmer paper.
- Now you can assemble. Using adhesive, attach the sentiment oval to the designer paper oval. Using dimensionals or foam tape, adhere those ovals to the larger silver scalloped oval piece. Then using dimensionals again, adhere the oval stack to the ornate frame. This is the focal point for the card. Using foam tape, adhere the focal point to the center of the lace piece.
- Now you can embellish. I attached the embellishment piece that I die cut to the top of the ovals, added sheer ribbon tied in a double bow, paper flowers with leaves, and rhinestone flat-back jewels. I added some white Wink of Stella to the petal edges to give the card some subtle sparkle.
- Using foam tape on the back of the designer paper, center on top of the card base. Attach the die cut message to the inside of your card. Your card is done. Isn't it stunning!
Because the card is has a lot of depth, an envelope would not be recommended and should be delivered in an envelope box pictured.
Supplies:
- 8 x 12 white cardstock
- 1 sheet designer paper
- 2 sheets white shimmer paper
- 3 x 4 piece silver shimmer paper
- Silver ink and embossing powder
- paper flowers
- sheer ribbon
- rhinestone jewels
- adhesive and foam tape or other dimensionals
- wedding stamp set
- score board and bone folder
- paper cutter
- Dies used in my card: Spellbinder's Cascading Grace Pocket, Spellbinder's Oval Ironwork, Spellbinder's Isadora Trinkets, Stampin' Up Oval set. Spellbinder's Venise Lace Cinch and Go Flowers Two was used to make the flowers.
I hope you enjoy making this card as much as I did. If you would like to purchase this card, please visit my Etsy shop here.
Thanks for stopping by and happy stamping!
Kathie K
Tuesday, August 1, 2017
Oriental themed note cards
Hello stampers,
I really like making oriental themed noted cards. They can be used for almost any sentiment - thank you, sympathy, thinking of you, or just a note card. Below is a set of 5 note cards that I made for a gift.
All the cards are 5 1/2 x 4 1/4 and each one has a matching envelope.
Three of these card use polished stone paper that I made - I have an earlier post that gives you the instructions. I think the oriental stamped images look great with the paper colors. The embellishments are little different on each card - each one has a ribbon or cording in different colors and textures. I really had a lot fun making these cards. I hope you give this a try.
I really like making oriental themed noted cards. They can be used for almost any sentiment - thank you, sympathy, thinking of you, or just a note card. Below is a set of 5 note cards that I made for a gift.
All the cards are 5 1/2 x 4 1/4 and each one has a matching envelope.
Three of these card use polished stone paper that I made - I have an earlier post that gives you the instructions. I think the oriental stamped images look great with the paper colors. The embellishments are little different on each card - each one has a ribbon or cording in different colors and textures. I really had a lot fun making these cards. I hope you give this a try.
You can see this set and many more on my Etsy shop.
Thanks for stopping by. Happy stamping.
Thursday, July 27, 2017
Ink Resist Technique
Hello stampers,
As you can probably tell from my recent posts, I like making cards with fun and creative backgrounds. I think the background of any card is what makes it really special and unique. The latest background technique that I am experimenting with is ink-resist.
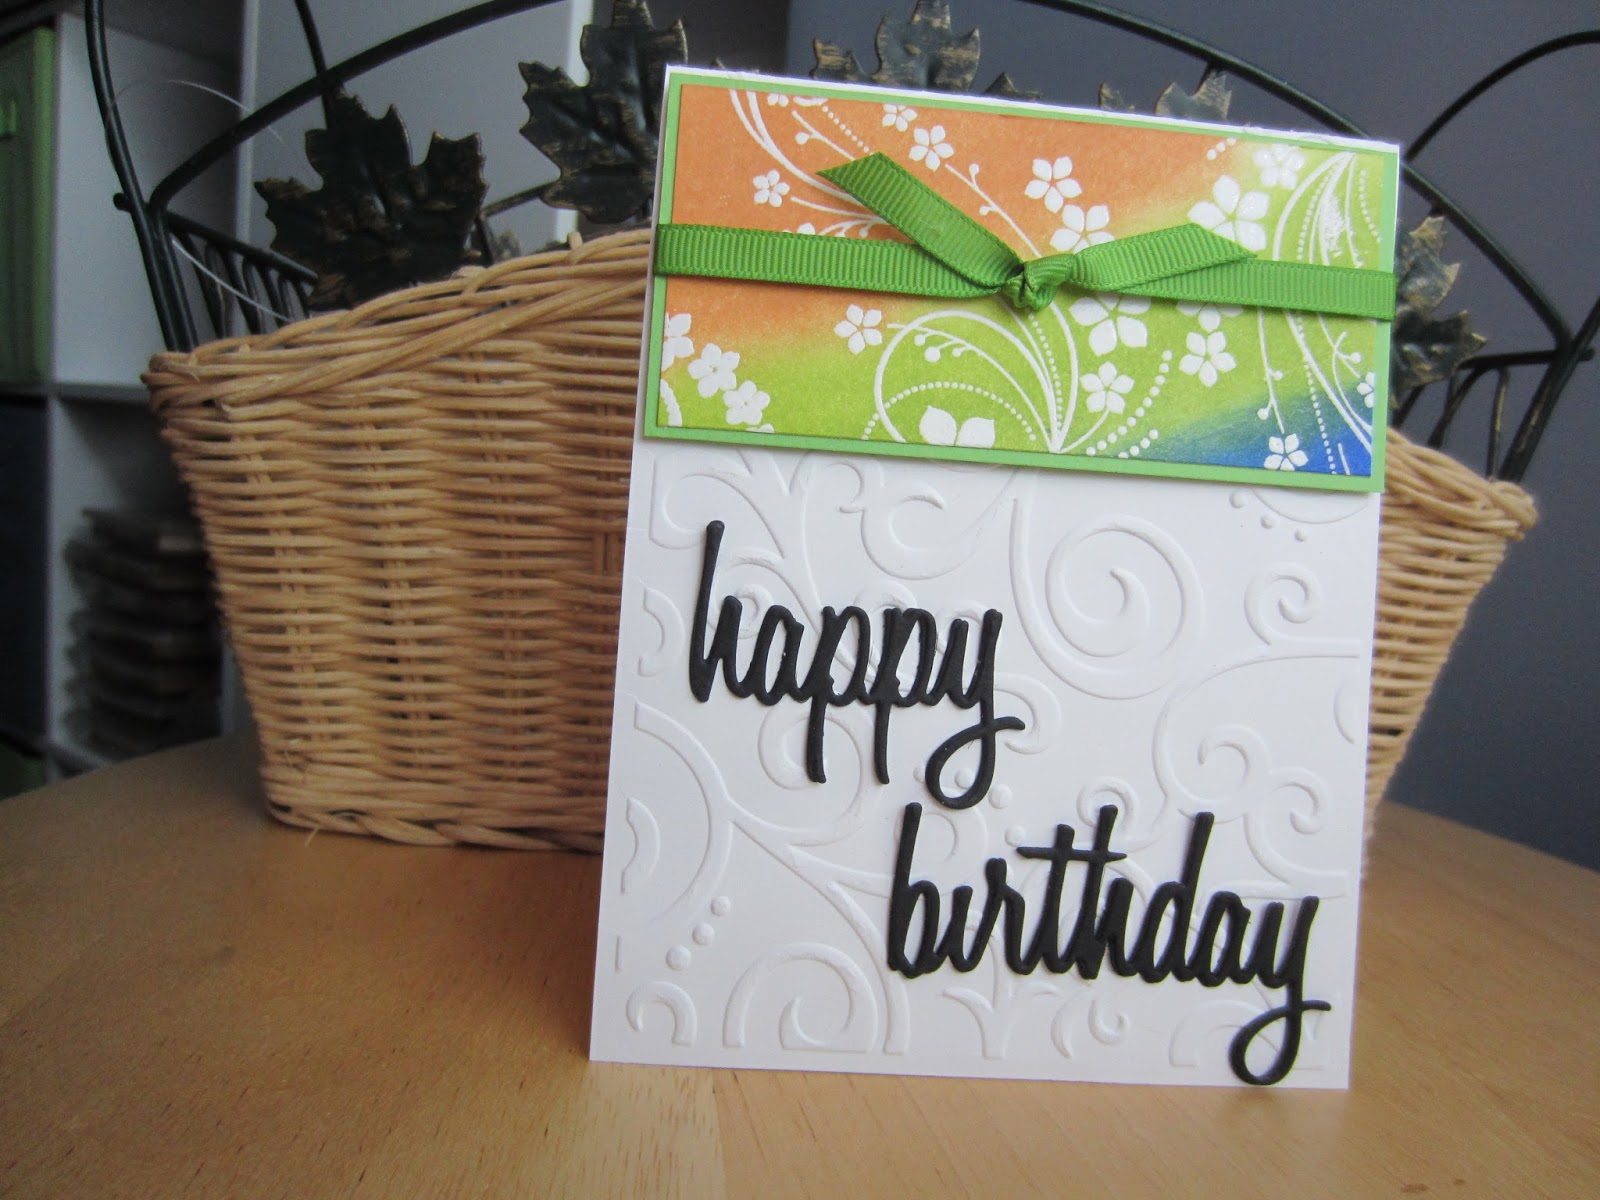
I made the backgrounds using Versamark ink and clear embossing powder. I like how the details of the stamped image show up so well. I applied the different colors of ink using sponges. I like using sponges because I can control how dark or light I want the color to be.
The first image is a sample of the ink-resist background cardstock before I have used it on a card. You can use any color combination that you like. On the sample piece, I sponged on three colors; I used four colors on the background of the anniversary and birthday cards.
The background on the anniversary and birthday cards were made from the same piece. Cutting the background cardstock into two pieces allowed me to stretch the use of the background paper and my creativity.
What are your favorite background techniques?
You can find these cards and many more on my Etsy shop. Exclusive savings for blog readers. Get free shipping on all orders over $20. Using coupon code BlogShip.
Thanks for visiting my blog.
Happy stamping!
As you can probably tell from my recent posts, I like making cards with fun and creative backgrounds. I think the background of any card is what makes it really special and unique. The latest background technique that I am experimenting with is ink-resist.
I made the backgrounds using Versamark ink and clear embossing powder. I like how the details of the stamped image show up so well. I applied the different colors of ink using sponges. I like using sponges because I can control how dark or light I want the color to be.
The first image is a sample of the ink-resist background cardstock before I have used it on a card. You can use any color combination that you like. On the sample piece, I sponged on three colors; I used four colors on the background of the anniversary and birthday cards.
The background on the anniversary and birthday cards were made from the same piece. Cutting the background cardstock into two pieces allowed me to stretch the use of the background paper and my creativity.
What are your favorite background techniques?
You can find these cards and many more on my Etsy shop. Exclusive savings for blog readers. Get free shipping on all orders over $20. Using coupon code BlogShip.
Thanks for visiting my blog.
Happy stamping!
Sunday, July 23, 2017
Polished Stone Background Technique
Hello Stampers,
The polished stone technique has been around for many years and is one that I still love. I thought I would share my take on the technique and some projects that I have made.
My first tip is to have fun! I like to experiment with different colors combinations. To do this, I use scrap pieces of glossy white card stock. And to keep track of my experiments, I jot down on the back of the scrap the ink colors and the order in which I applied the ink to the paper.
When I do this technique, I find that I like to have more control of the amount of ink that is applied to the paper. I apply one color at a time. I only use one color of ink on each cotton ball. This way I can apply more of one color to get the effect I am looking for. I saturate the cotton ball first with rubbing alcohol and then add two to three drops of ink. I then dab the inked cotton ball onto the glossy cardstock in a random fashion until I like the look. I repeat this two more time with two different color inks until I get the look I like. The paper will dry slightly lighter. Here are color combinations that I experimented with:
I also like to include a metallic ink - usually silver, gold or copper - to give it an extra shimmer and true marble look. My preference is to apply the metallic inks first and then the colored inks next. However, if you are looking for more metallic color, it does work great on top of the colored inks. Below are to samples of each way. When using non-alcohol metallic inks, you will need seal the ink. I simple spray a thin coat of hairspray and it seals great. The ink does not rub off. Here are two samples - the first one I applied the silver metallic ink first; the second sample shows the technique with the silver applied last.
While experimenting, I wanted to see if I could create the black veins of marble using a black reinker. When the black ink is mixed with alcohol it actually turns a deep purple and I did not get the look I was planning. However, the results were still interesting. The sample below was done with black, navy and lighter shade of blue.
When you use your new polished stone cardstock, stamp images directly onto the paper using Stazon inks or emboss the image. This will give you the best results. Here are a few cards that I made with the polished stone background:
I hope my tips inspire you to take another try at the polished stone technique. I truly love this technique because every card is different and unique. What a great way to showcase your creativity.
Check out my Etsy shop for cards that you can purchase. Thanks for visiting by blog.
Happy stamping!
The polished stone technique has been around for many years and is one that I still love. I thought I would share my take on the technique and some projects that I have made.
My first tip is to have fun! I like to experiment with different colors combinations. To do this, I use scrap pieces of glossy white card stock. And to keep track of my experiments, I jot down on the back of the scrap the ink colors and the order in which I applied the ink to the paper.
When I do this technique, I find that I like to have more control of the amount of ink that is applied to the paper. I apply one color at a time. I only use one color of ink on each cotton ball. This way I can apply more of one color to get the effect I am looking for. I saturate the cotton ball first with rubbing alcohol and then add two to three drops of ink. I then dab the inked cotton ball onto the glossy cardstock in a random fashion until I like the look. I repeat this two more time with two different color inks until I get the look I like. The paper will dry slightly lighter. Here are color combinations that I experimented with:
I also like to include a metallic ink - usually silver, gold or copper - to give it an extra shimmer and true marble look. My preference is to apply the metallic inks first and then the colored inks next. However, if you are looking for more metallic color, it does work great on top of the colored inks. Below are to samples of each way. When using non-alcohol metallic inks, you will need seal the ink. I simple spray a thin coat of hairspray and it seals great. The ink does not rub off. Here are two samples - the first one I applied the silver metallic ink first; the second sample shows the technique with the silver applied last.
While experimenting, I wanted to see if I could create the black veins of marble using a black reinker. When the black ink is mixed with alcohol it actually turns a deep purple and I did not get the look I was planning. However, the results were still interesting. The sample below was done with black, navy and lighter shade of blue.
When you use your new polished stone cardstock, stamp images directly onto the paper using Stazon inks or emboss the image. This will give you the best results. Here are a few cards that I made with the polished stone background:
I hope my tips inspire you to take another try at the polished stone technique. I truly love this technique because every card is different and unique. What a great way to showcase your creativity.
Check out my Etsy shop for cards that you can purchase. Thanks for visiting by blog.
Happy stamping!
Saturday, July 15, 2017
Birthday cards for him and her
Hello fellow stampers,
I love sending handmade birthday cards to friends and family to help make their day a little more special. The following cards were a lot of fun to make using a couple of my favorite stamps sets from Stampin' Up - Pocket Fun and Lovely as a Tree.
The pocket card has the sentiment behind the pocket as a little surprise. The flowers were made using a flower and daisy punch. I curled the edges to them a little dimension. There is a flower on the inside of the card and on the envelope to tie everything together. I used pearl-type embellishments as the centers.
The main colors are Dapper Denim and Always Artichoke from Stampin Up. The flowers were punched from designer paper in my stash. Here's a tip: when you have a small scrap of designer paper, punch a couple of flowers and save for a future projects. I store mine in an extra plastic box but anything will work.
I just love the Lovely as a Tree stamp set. It's great for any card for him and for her. This one I think is a perfect for a special guy - not too feminine. The tree is stamped in black and the background colors were quickly sponged on.
The main color for this card is also Dapper Denim with black accents. The black ribbon tied in a know gives the card dimension and serves as place to pop-up the sentiment. I also stamped the inside of the card and on the envelope with the multi-tree stamp.
Both cards are available for purchase on my Etsy shop, Handmade By Kathie K.
Happy stamping!
I love sending handmade birthday cards to friends and family to help make their day a little more special. The following cards were a lot of fun to make using a couple of my favorite stamps sets from Stampin' Up - Pocket Fun and Lovely as a Tree.
The pocket card has the sentiment behind the pocket as a little surprise. The flowers were made using a flower and daisy punch. I curled the edges to them a little dimension. There is a flower on the inside of the card and on the envelope to tie everything together. I used pearl-type embellishments as the centers.
The main colors are Dapper Denim and Always Artichoke from Stampin Up. The flowers were punched from designer paper in my stash. Here's a tip: when you have a small scrap of designer paper, punch a couple of flowers and save for a future projects. I store mine in an extra plastic box but anything will work.
I just love the Lovely as a Tree stamp set. It's great for any card for him and for her. This one I think is a perfect for a special guy - not too feminine. The tree is stamped in black and the background colors were quickly sponged on.
The main color for this card is also Dapper Denim with black accents. The black ribbon tied in a know gives the card dimension and serves as place to pop-up the sentiment. I also stamped the inside of the card and on the envelope with the multi-tree stamp.
Both cards are available for purchase on my Etsy shop, Handmade By Kathie K.
Happy stamping!
Subscribe to:
Posts (Atom)
Airplane easel birthday card
Crafting Joy: A Beautifully Designed Handmade Birthday Card Birthdays are a celebration of life, love, and the joy of making memories. Wha...
-
Hello card markers, I have a very fun birthday card for you today. It's a super colorful gnome themed card with a fun-fold page. This ...
-
Hello fellow card makers, Thank you for visiting my blog! I have another fun-fold card for you. I call this a bay window fun-fold card - t...
-
Hello fellow stampers and card makers! I am in love with this technique! Doesn't the background look like tarnished metal? I think...