Showing posts with label fun fold card. Show all posts

Saturday, January 14, 2023

Gnome birthday fun-fold card tutorial


Hello card markers,
I have a very fun birthday card for you today. It's a super colorful gnome themed card with a fun-fold page. This card is great for birthdays but can be used for other occasions too. This card has lots of layers and die cuts but is quite easy to make.

The tutorial below is for a card with a finished size of 5 1/2 x 4 1/4 (A2) but it is easy to convert to large sizes if desired.

Here's what you need to create the card:
  • Card base - cut one piece 5 1/2 x 10 1/4 and one piece 5 1/2 x 4
    • Score the large piece at 1 1/2, 3, 4 1/2 and 6 - accordion fold burnish fold line
    • Score smaller piece on short side at 3 1/2 -fold to create a flap
    • Adhere the smaller piece to the larger piece - I glued the flap to the back, however you can also glue to the front as it will be covered by a stamped piece
  • Mat layers: cut two 5 3/8 x 1 3/8, cut four 1 3/8 x 1 3/8, and cut two 2 3/8 x 1 3/8 
  • Background paper - I made mine own so I could match the color of cardstock I used for the base, mat layer and die cuts; cut two 5 1/4 x 1 1/4, cut two 2 1/4 x 1 1/4, and cut four 1 1/4 x 1 1/4
  • Adhere the background paper to the mat layers
  • To make the shutter cut-out, cut between the first three score lines. The first cut. measure down 1 1/2" from the top edge cutting from the first score to the third. Repeat the same cut from the bottom edge. The cut out section now becomes a mountain fold with the top and bottom sections remain valley folds.
  • Adhere the mat and background paper pieces to the sections of the card base.
  • Flap panel - cut mat layer 5 3/8 x 3 3/8 and white piece 5 1/4 x 3 1/4 - I used the same stamps and colors that I used to create the background paper. Stamp you sentiment and gnome; adhere die cuts - I used mushrooms and grass.
  • Add other die cuts to the front panel including the gnome, mushrooms, grass, and birthday sign.
  • To finish off the card, cut a white piece 5 3/8 x 4 1/8. This panel can also be stamped like the other panel and will be used for you personal message.
I used several leaf stamps to create the background - I created a one-sheet wonder piece and cut to the dimensions mentioned above. I used several gnome stamps sets and die sets to get the look I wanted. This card is a great way to use what you already have in your stash.

I hope you can give this card a try - lots fun to make and to receive. If you would like to purchase this card, please visit my Etsy shop - you can also see all of my handmade creations,

Happy card making,
Kathie K

Saturday, January 7, 2023

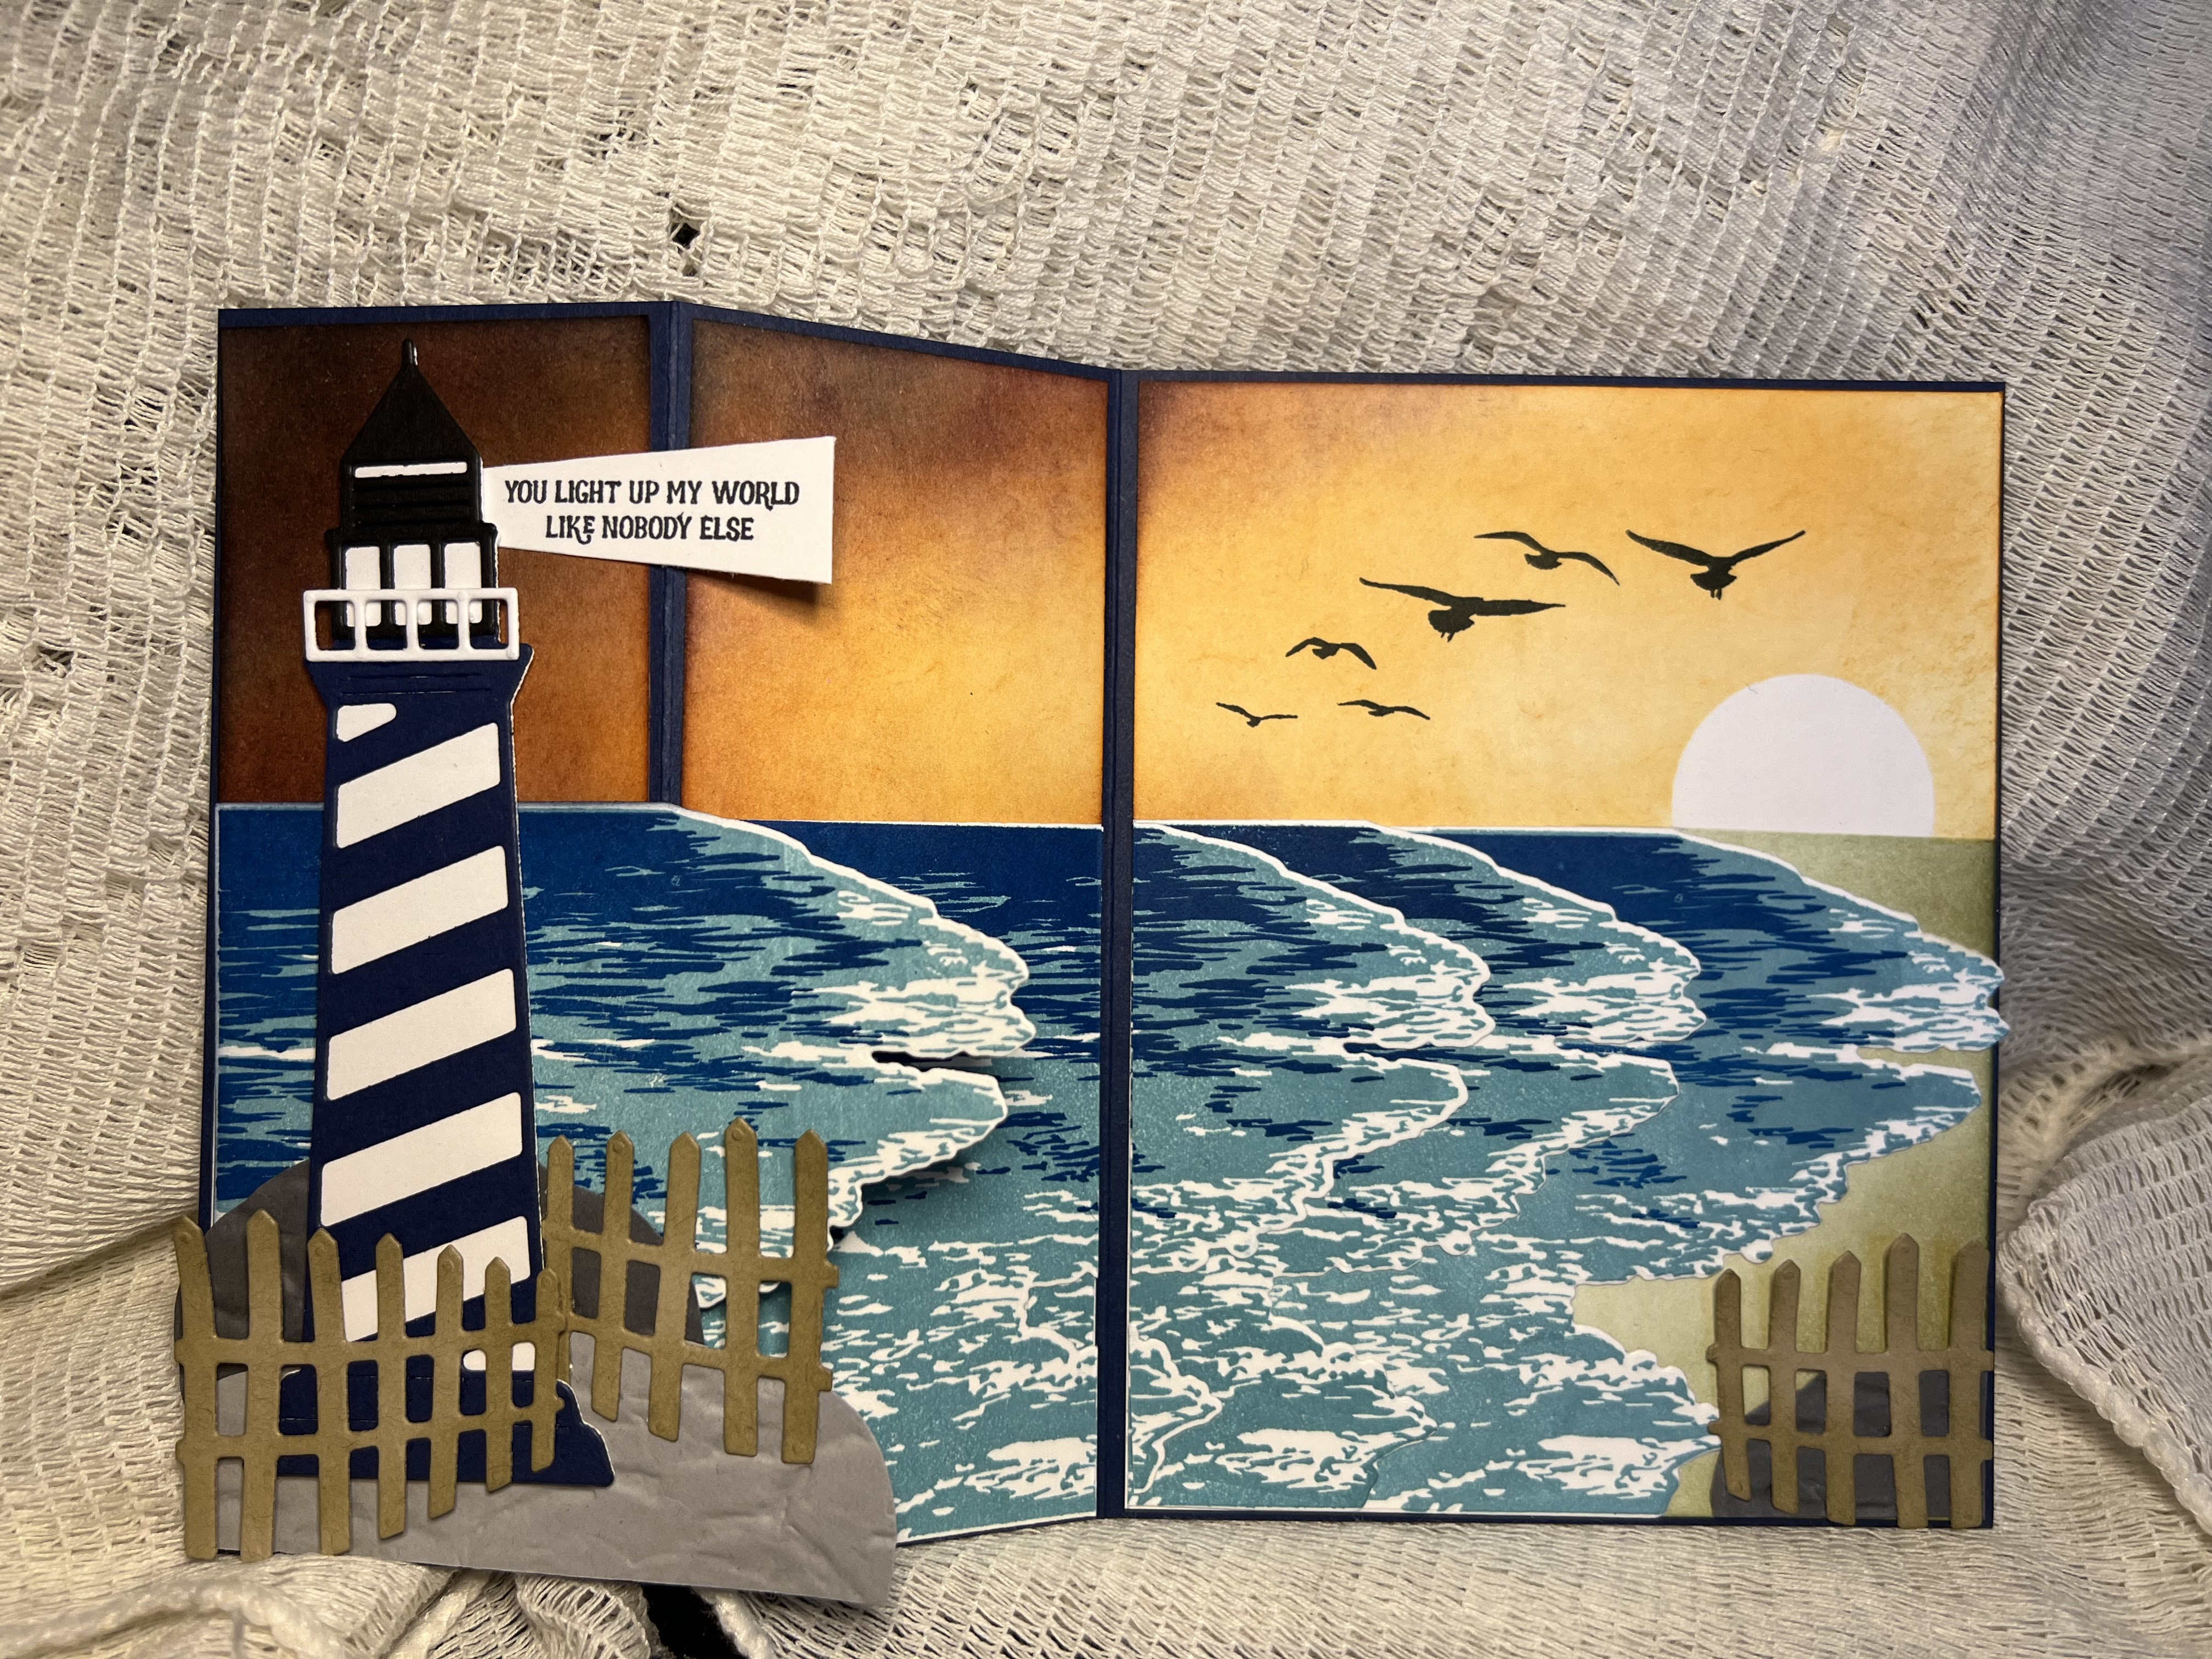
Lighthouse on the beach fun-fold card


Hello stampers and crafters,

This is one of my favorite cards - it's fun to make and can be used for many ocassions. The z-fold design really makes the beach scene come alive.


This card is easy to make - here's how:
Cut a piece of navy cardstock 5 1/2 x 8 1/2 and score along the 8 1/2 side at 2 1/8 and 4 1/4. To create the scene, you will need two white pieces 5 3/8 x 2 and 2 pieces 5 3/8 x 4 1/8 (one piece is for the back). Sponge on sand color on the right side of large pices and sun set colors on the top. Cut four wave images - these will be layered to create a more realistic beach scene.


Add the last wave image to tbe first panel, add rocks, lighthouse and fence. For additional interest, I added a stone fence to the large panel. To finish the card, stamp images in the last large white pieces and adhere to the back.


I hope you give this card are try. If you would like to purchase this care, please visit my Etsy shop - you can also see all my handmade creations.

Happy card making!
Kathie K


Sunday, October 16, 2022

Under the Sea Pop-up Diorama Birthday Card


This card definitely has the "wow factor". The pop-up diorama along with the seahorses, fish, coral and shells really make this a special card. The style of card can be used with any theme - here's how you create the pop-up diorama.

  1. Cut the cardstock for the card base - 5 1/2 x 8
  2. Cut another piece of cardstock for the diorama  - 5 1/2 x 8 1/2
  3. Cut another piece 5 1/2 x 4 3/4 for the diorama insert
  4. Score diorama piece at 1/2, 4 1/4, and 4 3/4; score insert at 1/4 and 4 1/2
  5. Bernish score lines and fold to make a box.
  6. Glue back flap of diorama box to the outside of cardstock base - for this card, I wanted the lighter card base color to be the background of the diorama scene
  7. Glue the left small flap to card  - tip: lay card completely flat and line up the flap to the fold line on the card base; close card and glued edge will be in the correct spot.
The pop-up diorama is created when the card is opened. From here, you can add as many die cut pieces and embellishments as you like to create your own scene.

I hope you give this fun fold a try - your friends and family will love it! If you would like to purchase this card, please visit my Etsy shop - you can also see all of my handmade creations.

Make today a crafty day!
Kathie K.


Monday, March 22, 2021

Peacock Z Fold Birthday Card


This peacock birthday definitely has the wow factor. The elegant foil cardstock combined with the fun, Z-fold will wow any recipient. And its so easy to make.

The card expands to 11" and folds to an A2 size (5 1/2 x 4 1/4) and fits nicely into a standard envelope. I chose a blue color pallet but any color combination will work great. Here's what you'll need:
  • Blue cardstock cut to 11 x 4 1/4; score at 2 3/4" and 5 1/2"
  • Designer paper with a blue foil design - cut 2 panels 4 1/8 x 2 5/8
  • White cardstock for floral oval, sentiment tag and hexagon dies (approximately 4 1/4 x 5 1/2)
    • Cut 2 hexagons; trim each one to 2 1/2" long
  • Blue, gold and light teal foil/mirror cardstock - enough to cut feathers and peacock:
    • Blue - cut peacock, large feather, medium feather
    • Gold - cut triple feather, medium feather, small swirl feather
    • Teal - cut triple feather, and small swirl feather
  • Anno Griffin Peacock and Feathers die set
  • Spellbinders Floral Oval die set
  • Stampin' Up Fancy Frames die set
  • Teal rhinestones (not pictured)
  • Happy birthday stamp
  • Peacock feather stamp for envelope (Hero Arts Color Layering Peacock)
Instructions:
  1. Make the Z fold using the score lines
  2. Attach designer paper to first two panels
  3. Place the large oval die white cut in center of large blue panel and adhere; attach large blue feather along right side of oval
  4. Attach the cut hexagon die cuts lining up the cut ends at the fold; this will become the base that the peacock and feathers will attach to.
  5. Build the peacock by attaching the feathers to the back of the blue peacock; start with the gold and teal triple feathers; add the medium blue feather, gold and teal swirl feather and finish with the gold medium feather towards the bottom. Tip: Glue dots work great for attaching the feathers; make sure the feathers do not hang off the card base when folded.
  6. Using dimensionals, adhere peacock to the front panel.
  7. To finish off the card, attach small teal rhinestones to the peacock for the eye and add to sentiment die cut.


I hope you give this card a try. It so much easier than looks and will be sure to impress.

Happy card making!
Kathie K.


Friday, May 15, 2020

Teepee or Pyramid Birthday Card


I really like making this style of card. I like being able to decorate three sides of the card. These cards have a huge impact and are really easy to make. I have tried a couple different ways to make to these cards and here is my favorite.

You will need:
  • 3 - 4" squares of cardstock for the base
  • 2 - 3 7/8" squares decorative paper for the outside
  • 1 - 3 7/8" square decorative paper for the inside
  • 1 - 3 7/8" square white cardstock - inside note and signature panel
  • Embellishments - tags, die cuts, etc

Constructing the card:
  1. Score the base squares in half on the diagonal; fold and burnish
  2. Cut decorative squares and inside panel in half on the diagonal - you will have triangles
  3. To for the teepee or pyramid, place one square on work surface with the score line vertical; the piece will look like a diamond. Place the other base squares on each side of the diamond matching the top points and the edge of the square to the score line of the diamond. Glue squares together.
  4. Arrange the triangles to your liking and glue in place on the base - outside and inside
  5. To close the flap on the teepee, you can use Velcro dots or my preference is to cut a small slit and insert the tip of the flap to close. Do this measure up the from the tip of the base 2 1/8" and then cut a 3/4" slit horizontally starting at the score line. You will need to cut through the decorative layers and the base cardstock. Insert the tip of the flap and your card will stand up on its own.
  6. Use embellishments to decorate. I like to place a die cut over the close slit to hide.


When the card is unfolded, it will fit in a standard envelope. The card pictured actually fits in a larger envelope due to the embellishments.


I hope you give this card a try. If you would like to purchase this card, check out my shop here.

The products I used are from Stampin' Up and will be discontinued on June 2, 2020. If you would like to order, the products are listed below. Please use this Host Code when ordering: CGCB6Z76

Free as Bird stamp and die set bundle - #151123
Bird Ballad Designer paper - #149592

Happy stamping.
Kathie K.

Airplane easel birthday card

  Crafting Joy: A Beautifully Designed Handmade Birthday Card Birthdays are a celebration of life, love, and the joy of making memories. Wha...