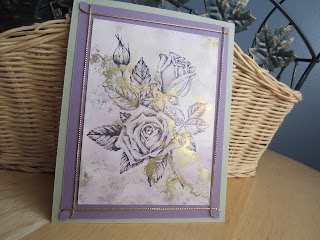
The polished stone technique has been around for many years and is one that I still love. I thought I would share my take on the technique and some projects that I have made.
My first tip is to have fun! I like to experiment with different colors combinations. To do this, I use scrap pieces of glossy white card stock. And to keep track of my experiments, I jot down on the back of the scrap the ink colors and the order in which I applied the ink to the paper.
When I do this technique, I find that I like to have more control of the amount of ink that is applied to the paper. I apply one color at a time. I only use one color of ink on each cotton ball. This way I can apply more of one color to get the effect I am looking for. I saturate the cotton ball first with rubbing alcohol and then add two to three drops of ink. I then dab the inked cotton ball onto the glossy cardstock in a random fashion until I like the look. I repeat this two more time with two different color inks until I get the look I like. The paper will dry slightly lighter. Here are color combinations that I experimented with:
I also like to include a metallic ink - usually silver, gold or copper - to give it an extra shimmer and true marble look. My preference is to apply the metallic inks first and then the colored inks next. However, if you are looking for more metallic color, it does work great on top of the colored inks. Below are to samples of each way. When using non-alcohol metallic inks, you will need seal the ink. I simple spray a thin coat of hairspray and it seals great. The ink does not rub off. Here are two samples - the first one I applied the silver metallic ink first; the second sample shows the technique with the silver applied last.
While experimenting, I wanted to see if I could create the black veins of marble using a black reinker. When the black ink is mixed with alcohol it actually turns a deep purple and I did not get the look I was planning. However, the results were still interesting. The sample below was done with black, navy and lighter shade of blue.
When you use your new polished stone cardstock, stamp images directly onto the paper using Stazon inks or emboss the image. This will give you the best results. Here are a few cards that I made with the polished stone background:
I hope my tips inspire you to take another try at the polished stone technique. I truly love this technique because every card is different and unique. What a great way to showcase your creativity.
Check out my Etsy shop for cards that you can purchase. Thanks for visiting by blog.
Happy stamping!


No comments:
Post a Comment