Sunday, March 23, 2025

Airplane easel birthday card


Crafting Joy: A Beautifully Designed Handmade Birthday Card
Birthdays are a celebration of life, love, and the joy of making memories. What better way to express your heartfelt sentiments than with a handmade birthday card? In this post, we delve into the beauty of creating something unique—a new design that brings creativity and warmth to someone's special day.

The Inspiration Behind the Design
This handmade card was born out of the desire to blend elegance with a personal touch. Its design harmonizes vibrant colors, textured layers, and thoughtful embellishments that evoke the essence of celebration. The idea was to craft a card that's not just a greeting, but a keepsake—a little treasure to remind someone of how cherished they are.

A Peek into the Details
The card features a minimalist yet sophisticated aesthetic. Using a combination of die cuts and unique fold, it captures a balance between modern artistry and classic charm. The simple interactive design is easy to and fun to create.

The finished size of this card is 5 x 7. To create the easel, fold the base card in half and cut the outer edges at 1 or 1 1/4 inches. Fold the center panel in half to create the easel. And then decorate - just remember to only attach layers to the center panel.


I hope you have as much fun as I did making this card.

Happy crafting, 
Kathie K.


Sunday, January 29, 2023

Bay Window Fun-fold Card Tutorial


Hello fellow card makers,

Thank you for visiting my blog! I have another fun-fold card for you. I call this a bay window fun-fold card - there maybe other names for this design as well. I made it into a Thank You card but this design would work for any sentiment. The card lays flat into a standard A6 (6 1/2 x 4 3/4) envelope. To create this card you will need a scoring tool or board, rectangle cutting dies, cardstock, stamps and die cuts to decorate.

Here's how you make this fun card:

  • Cardstock:
    • Card base: cut one piece 4 1/2 x 6 1/4; cut a second piece 4 1/2 x 6 3/4
    • Front panel: cut a piece of brick background or white 4 3/8 x 5 3/8
    • Inside panel; cut white piece 4 1/2 x 4 3/8
                Note: I stamped the brick pattern on white cardstock and inked the edges.
  • Scoring and cutting:
      • Largest card base piece: score at 1/2", 7/8" and 6 3/8; first score line fold into a mountain or away from the front; second and third score lines are valley folds; burnish each fold
      • Adhere the brick piece to the scored card base between the second and third score lines; wait of few minutes for the pieces to bond and then score through both layers so you may need to make a few passes, at 2 3/8 and 4 7/8 - both will be mountain folds - this creates the bay window
      • Using rectangle dies, I used two different sizes but your windows can be the same size if you prefer, cut windows between the score lines on each panel
      • Attach the two card base piece together: fold the 1/2" flap over the edge of the smaller card base piece and glue to the back, then glue down the next scored section (less than 1/2 inch) to the front. Once you do this step, the bay window form
      • Open card and adhere the inside white panel as close to the fold as possible but do not cover the fold line - see below

Your card is now ready to decorate. I used several die cut sets from my stash to create the hanging pot, shelf, planters and pots. You will need to create a die cut that will act as the stopper for the bay window. I used a large planter and added leaves; I placed foam dimentionals on the back so the small flap on the right side of the card can slide in (see first picture). The card folds flat and fits nicely into the A6 envelope.

Here are a few other design ideas:
  • Die cut or stamp a Christmas tree and presents for a Christmas card
  • Decorate with furniture die cuts for a congratulations on your new home card
  • Place pet (dogs, cats, etc) dies in the window for a Miss You card
I hope you give this fun-fold a try - its so much fun to make and the seasons and sentiments are endless. If you would like to purchase this card or see my other card designs, please visit my Esty shop.

Happy card making,
Kathie K.


Tuesday, January 17, 2023

Center Panel Easel Card Tutorial


Hello card makers,

I have another fun-fold card tutorial for you. This is a center panel easel card - this was made for a birthday but can be used for any sentiment.

For this design I created my own patterned paper using a stamp set and embossing folder from my stash,. This card is an A2 (5 1/2 x 4 1/4) size but the fun-fold can be easily converted to a larger size. 

Here's what you need and how to make this card:

  • Card base - cut 8 1/2 x 5 1/2 and score at 4 1/4 and fold in half; on the front panel starting at the score line, cut 1 1/4 on each side to form two flaps; fold the center panel in half towards the score line - this makes the easel
  • Mat and layers - cut two pieces in a coordinating color 1 1/8 x 4 1/8 and two pieces of patterned paper 1 x 4; adhere the patterned pieces to mat pieces; adhere those to the flaps on the card base; adhere the flaps down to the base of the card - the only loose piece is the center folded panel 
  • To make the center easel, cut two mat layers 2 x 2 7/8 in the coordinating color and glue down to each side of fold line on the center panel; cut one piece of patterned paper 4 x 2 3/4 (I used a brick embossing folder and rubbed on ink so it would resemble a brick wall); adhere the larger patterned paper piece to the section closest to the edge of the card so the card can still bend into an easel


  • For the inside (shown above), cut a piece of white or vanilla cardstock 2 7/8 x 2 1/2 and stamp with coordinating color and stamp set; cut a piece of patterned paper 2 1/2 x 1 1/2 and a smaller piece of cardstock with your sentiment - I used a rectangle die to cut out the sentiment; add dimension to the sentiment and adhere to the patterned paper - this makes the stopper or ledge for the easel; adhere both pieces to the card base like shown above.
  • Decorate your card with die cuts and/or stamped images to finish it off. This card will fit into a standard size A2 envelope.
This is such a fun card to make and one your friends and family will love to display! I hope you give the center easel card a try. If you would like to purchase this card, please visit my Etsy shop - you can also see all of my handmade creations,

Happy card making!
Kathie K

Saturday, January 14, 2023

Gnome birthday fun-fold card tutorial


Hello card markers,
I have a very fun birthday card for you today. It's a super colorful gnome themed card with a fun-fold page. This card is great for birthdays but can be used for other occasions too. This card has lots of layers and die cuts but is quite easy to make.

The tutorial below is for a card with a finished size of 5 1/2 x 4 1/4 (A2) but it is easy to convert to large sizes if desired.

Here's what you need to create the card:
  • Card base - cut one piece 5 1/2 x 10 1/4 and one piece 5 1/2 x 4
    • Score the large piece at 1 1/2, 3, 4 1/2 and 6 - accordion fold burnish fold line
    • Score smaller piece on short side at 3 1/2 -fold to create a flap
    • Adhere the smaller piece to the larger piece - I glued the flap to the back, however you can also glue to the front as it will be covered by a stamped piece
  • Mat layers: cut two 5 3/8 x 1 3/8, cut four 1 3/8 x 1 3/8, and cut two 2 3/8 x 1 3/8 
  • Background paper - I made mine own so I could match the color of cardstock I used for the base, mat layer and die cuts; cut two 5 1/4 x 1 1/4, cut two 2 1/4 x 1 1/4, and cut four 1 1/4 x 1 1/4
  • Adhere the background paper to the mat layers
  • To make the shutter cut-out, cut between the first three score lines. The first cut. measure down 1 1/2" from the top edge cutting from the first score to the third. Repeat the same cut from the bottom edge. The cut out section now becomes a mountain fold with the top and bottom sections remain valley folds.
  • Adhere the mat and background paper pieces to the sections of the card base.
  • Flap panel - cut mat layer 5 3/8 x 3 3/8 and white piece 5 1/4 x 3 1/4 - I used the same stamps and colors that I used to create the background paper. Stamp you sentiment and gnome; adhere die cuts - I used mushrooms and grass.
  • Add other die cuts to the front panel including the gnome, mushrooms, grass, and birthday sign.
  • To finish off the card, cut a white piece 5 3/8 x 4 1/8. This panel can also be stamped like the other panel and will be used for you personal message.
I used several leaf stamps to create the background - I created a one-sheet wonder piece and cut to the dimensions mentioned above. I used several gnome stamps sets and die sets to get the look I wanted. This card is a great way to use what you already have in your stash.

I hope you can give this card a try - lots fun to make and to receive. If you would like to purchase this card, please visit my Etsy shop - you can also see all of my handmade creations,

Happy card making,
Kathie K

Saturday, January 7, 2023

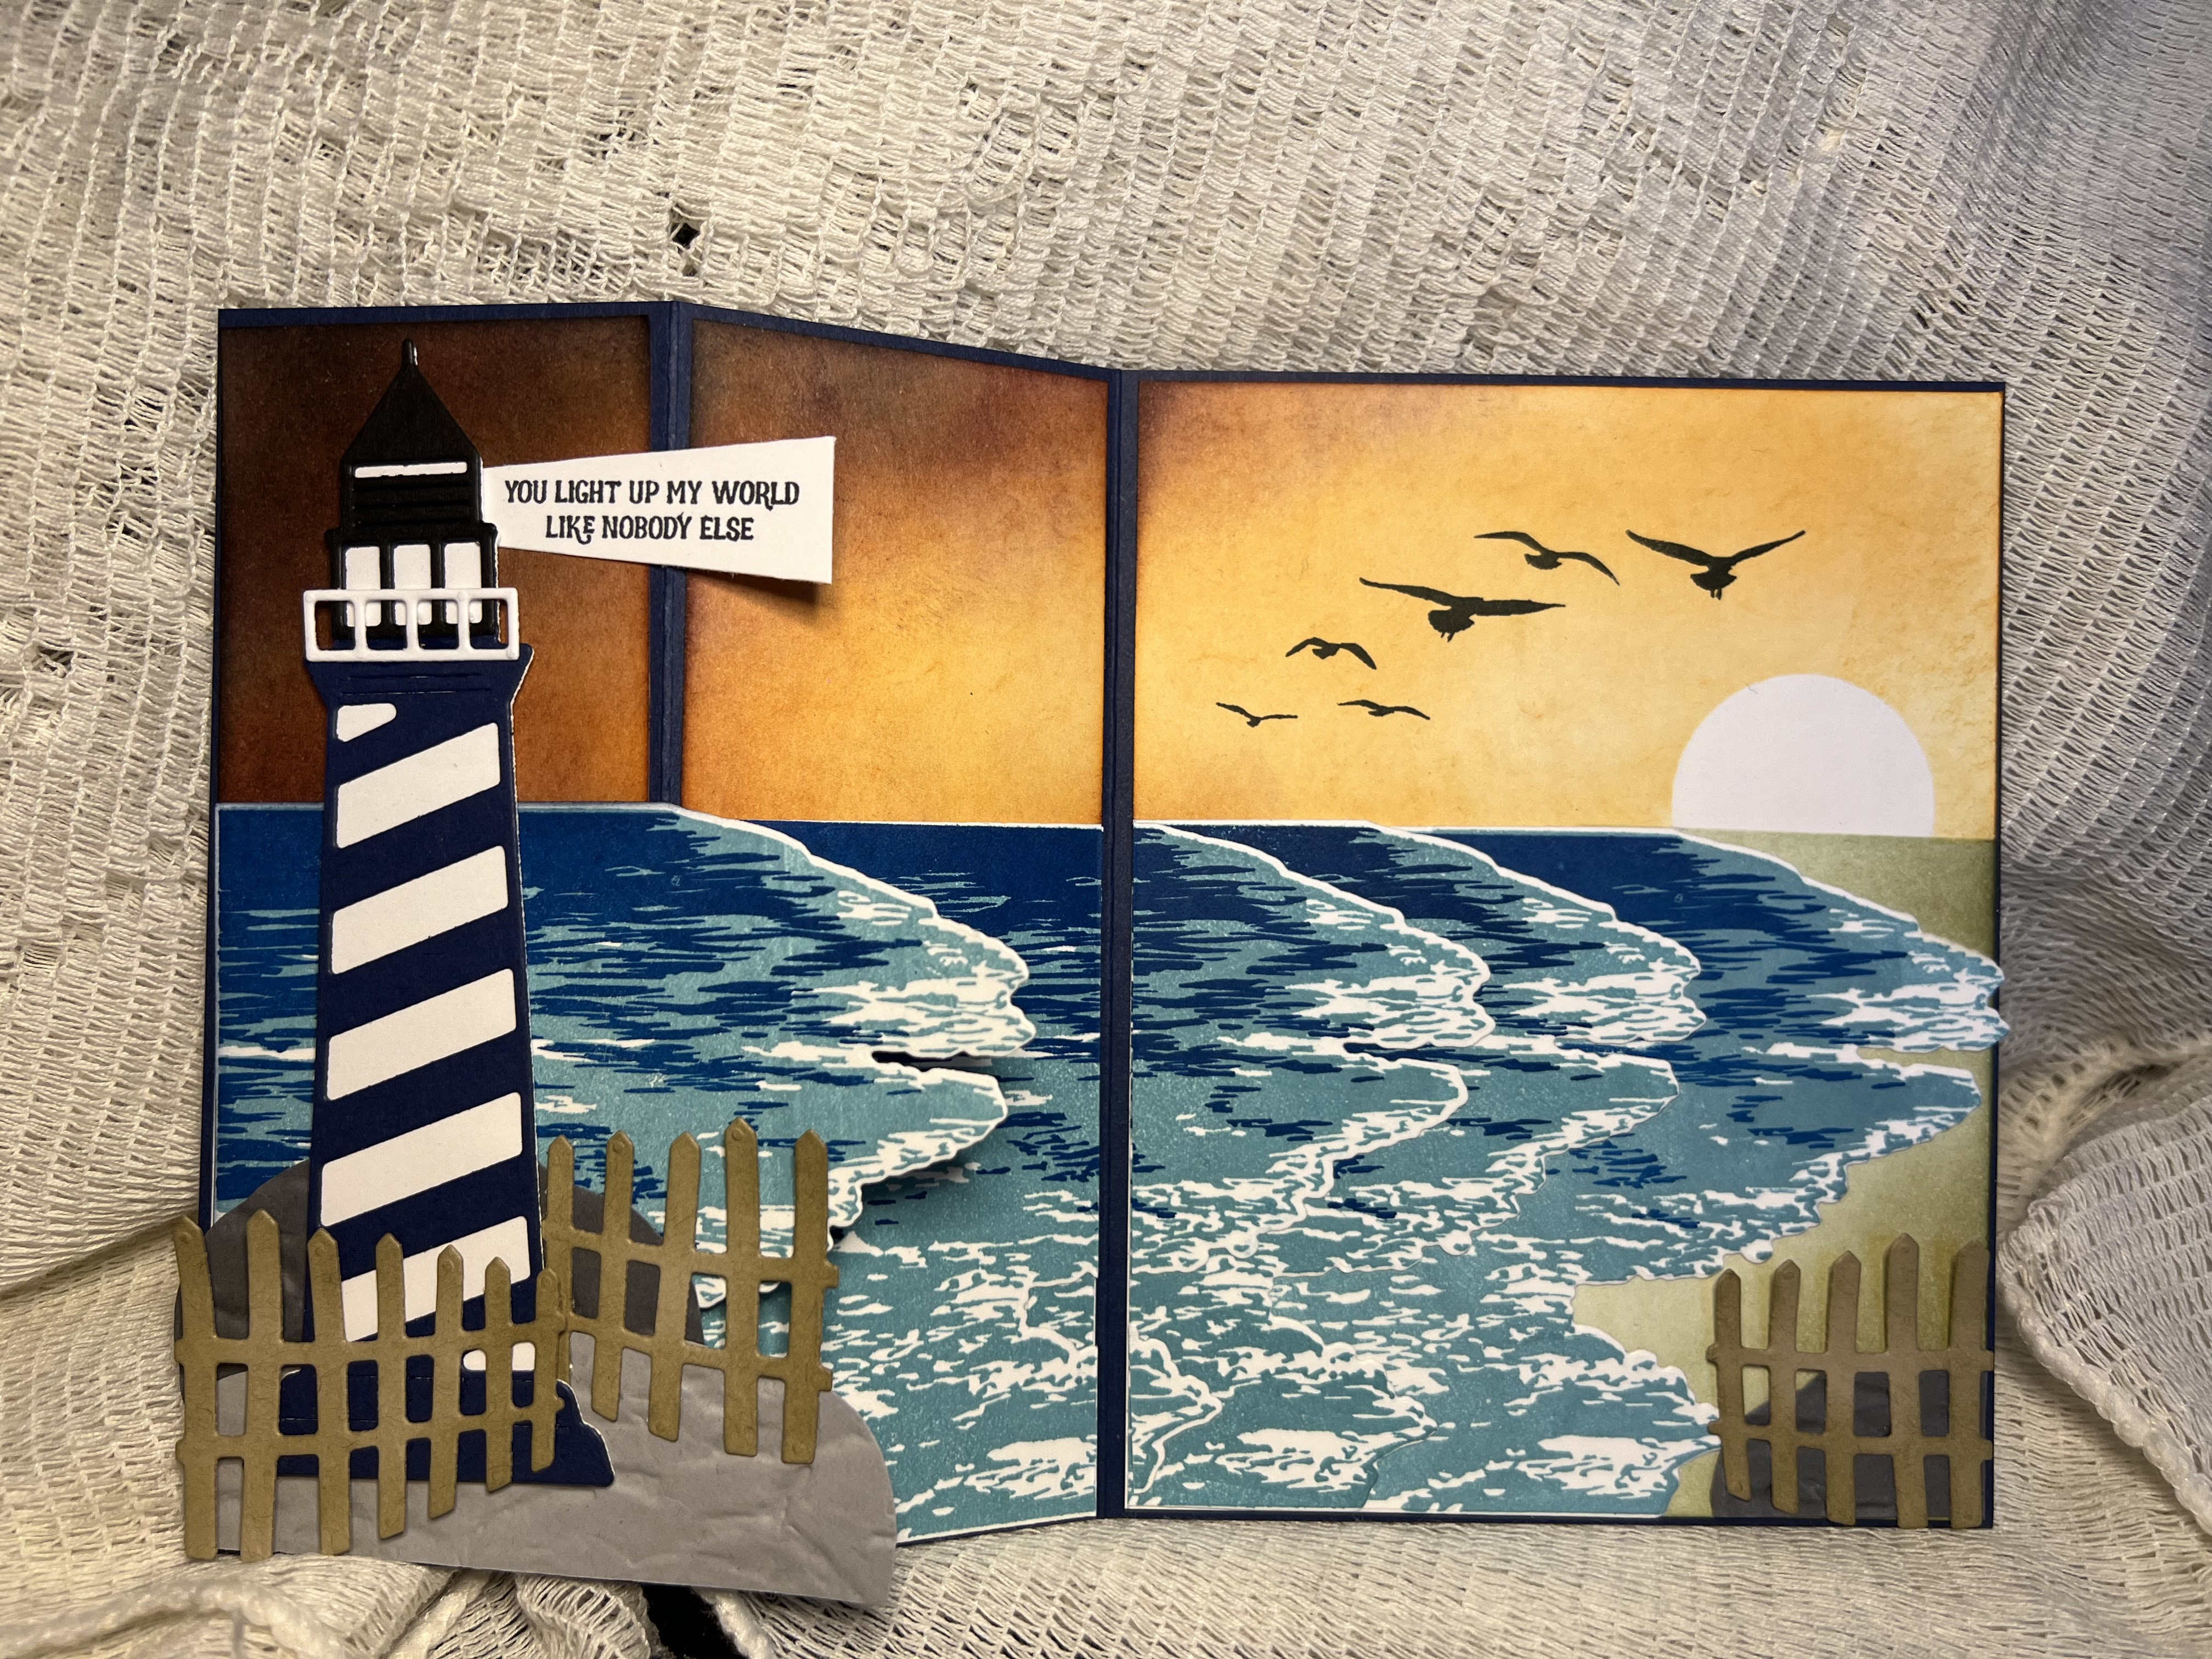
Lighthouse on the beach fun-fold card


Hello stampers and crafters,

This is one of my favorite cards - it's fun to make and can be used for many ocassions. The z-fold design really makes the beach scene come alive.


This card is easy to make - here's how:
Cut a piece of navy cardstock 5 1/2 x 8 1/2 and score along the 8 1/2 side at 2 1/8 and 4 1/4. To create the scene, you will need two white pieces 5 3/8 x 2 and 2 pieces 5 3/8 x 4 1/8 (one piece is for the back). Sponge on sand color on the right side of large pices and sun set colors on the top. Cut four wave images - these will be layered to create a more realistic beach scene.


Add the last wave image to tbe first panel, add rocks, lighthouse and fence. For additional interest, I added a stone fence to the large panel. To finish the card, stamp images in the last large white pieces and adhere to the back.


I hope you give this card are try. If you would like to purchase this care, please visit my Etsy shop - you can also see all my handmade creations.

Happy card making!
Kathie K


Sunday, October 16, 2022

Under the Sea Pop-up Diorama Birthday Card


This card definitely has the "wow factor". The pop-up diorama along with the seahorses, fish, coral and shells really make this a special card. The style of card can be used with any theme - here's how you create the pop-up diorama.

  1. Cut the cardstock for the card base - 5 1/2 x 8
  2. Cut another piece of cardstock for the diorama  - 5 1/2 x 8 1/2
  3. Cut another piece 5 1/2 x 4 3/4 for the diorama insert
  4. Score diorama piece at 1/2, 4 1/4, and 4 3/4; score insert at 1/4 and 4 1/2
  5. Bernish score lines and fold to make a box.
  6. Glue back flap of diorama box to the outside of cardstock base - for this card, I wanted the lighter card base color to be the background of the diorama scene
  7. Glue the left small flap to card  - tip: lay card completely flat and line up the flap to the fold line on the card base; close card and glued edge will be in the correct spot.
The pop-up diorama is created when the card is opened. From here, you can add as many die cut pieces and embellishments as you like to create your own scene.

I hope you give this fun fold a try - your friends and family will love it! If you would like to purchase this card, please visit my Etsy shop - you can also see all of my handmade creations.

Make today a crafty day!
Kathie K.


Sunday, May 1, 2022

Heard it through the grapevine

 Hello crafty friends,

If you like to color, this is the card for you. I find coloring to be therapeutic and really enjoy my creations coming to life through. My favorite medium to color is Copic markers using the Big & Bold stamps from The Colorado Craft Company.


This card has that Wow factor using very little supplies. Here's what you need:
  1. 5 1/2 x 8 1/2 white base
  2. 5 3/8 x 4 1/8 white top panel
  3. white pieces for the die cut
  4. Copic friendly black ink pad - I use Momento Tuxedo black
  5. Copic markers - the colors I used are E53, E55, E57, YG03, YG17, YG67, BV00, BV01, BV02, BV11, V17, BV08, V09, and V15
  6. Grapes Big & Bold stamps and dies set
To make the card, I stamped the grapes on a piece of Basic White cardstock and colored before die cutting. Since this is the center focal point of the card, I wanted it to have a little dimension. I die cut the image and then using the same grape die, but a white piece (no stamped image) and glued the two pieces together.

The image will be larger than the card base so some of the edges will need to be trimmed. I stamped the sentiments, die cut and popped them up on the card. To had a little sparkle, I added a few sequins in coordinating colors. 

And that is it - super easy and super fun to color.


I hope you enjoy make this card as much as I did. 

Make today a crafty day!
Kathie K.


Friday, April 22, 2022

Wave Birthday Card

 Realistic wave - looks complicated; super easy to make.

I just love making this card and watching the recipients feel the wave almost like it's real. The layered stamp set from The Ton creates this realistic wave and color combinations are endless.


Here's what you need:
  • Basic Black cardstock (Stampin Up): cut 8 1/2 x 5 1/2 (card base) and a layered piece - the size will depend on the size of the die cut wave layer
  • Blue layer (retired Stampin Up): 4 1/8 x 5 3/8
  • Basic White (Stampin Up): scraps for tags, approximately 1/4 sheet for wave image, and 4 1/8 x 5 3/8 for inside
  • Smoky Slate (Stampin Up) ink page
Stamp Sets - I like stretching my stamps sets by mixing and matching:
  • Wave - The Ton
  • Wave set - Stampin Up
To create the wave image, you will need three coordinating colors. Here's what I used to create this blue wave:
  • 1st layer - I combined Balmy Blue and Pool Party (both from Stampin Up) to get the light aqua color
  • 2nd layer - Pacific Point ink pad (Stampin Up)
  • 3rd Layer - Night of Navy ink pad (Stampin Up:
Die - the dies I used are all from different sets - I liked coordinating the stitched edges:
  • Stitched rectangle - My Favorite Things
  • Sailing Away - Stampin Up
  • Tasteful Labels - Stampin Up

Die cut all the stamped images and layer. Adhere down the inside layer and that is it! Super easy but looks like you spent hours. I hope you give this stamp set a try - just beautiful.

Make today a creative day!
Kathie K.


Saturday, April 2, 2022

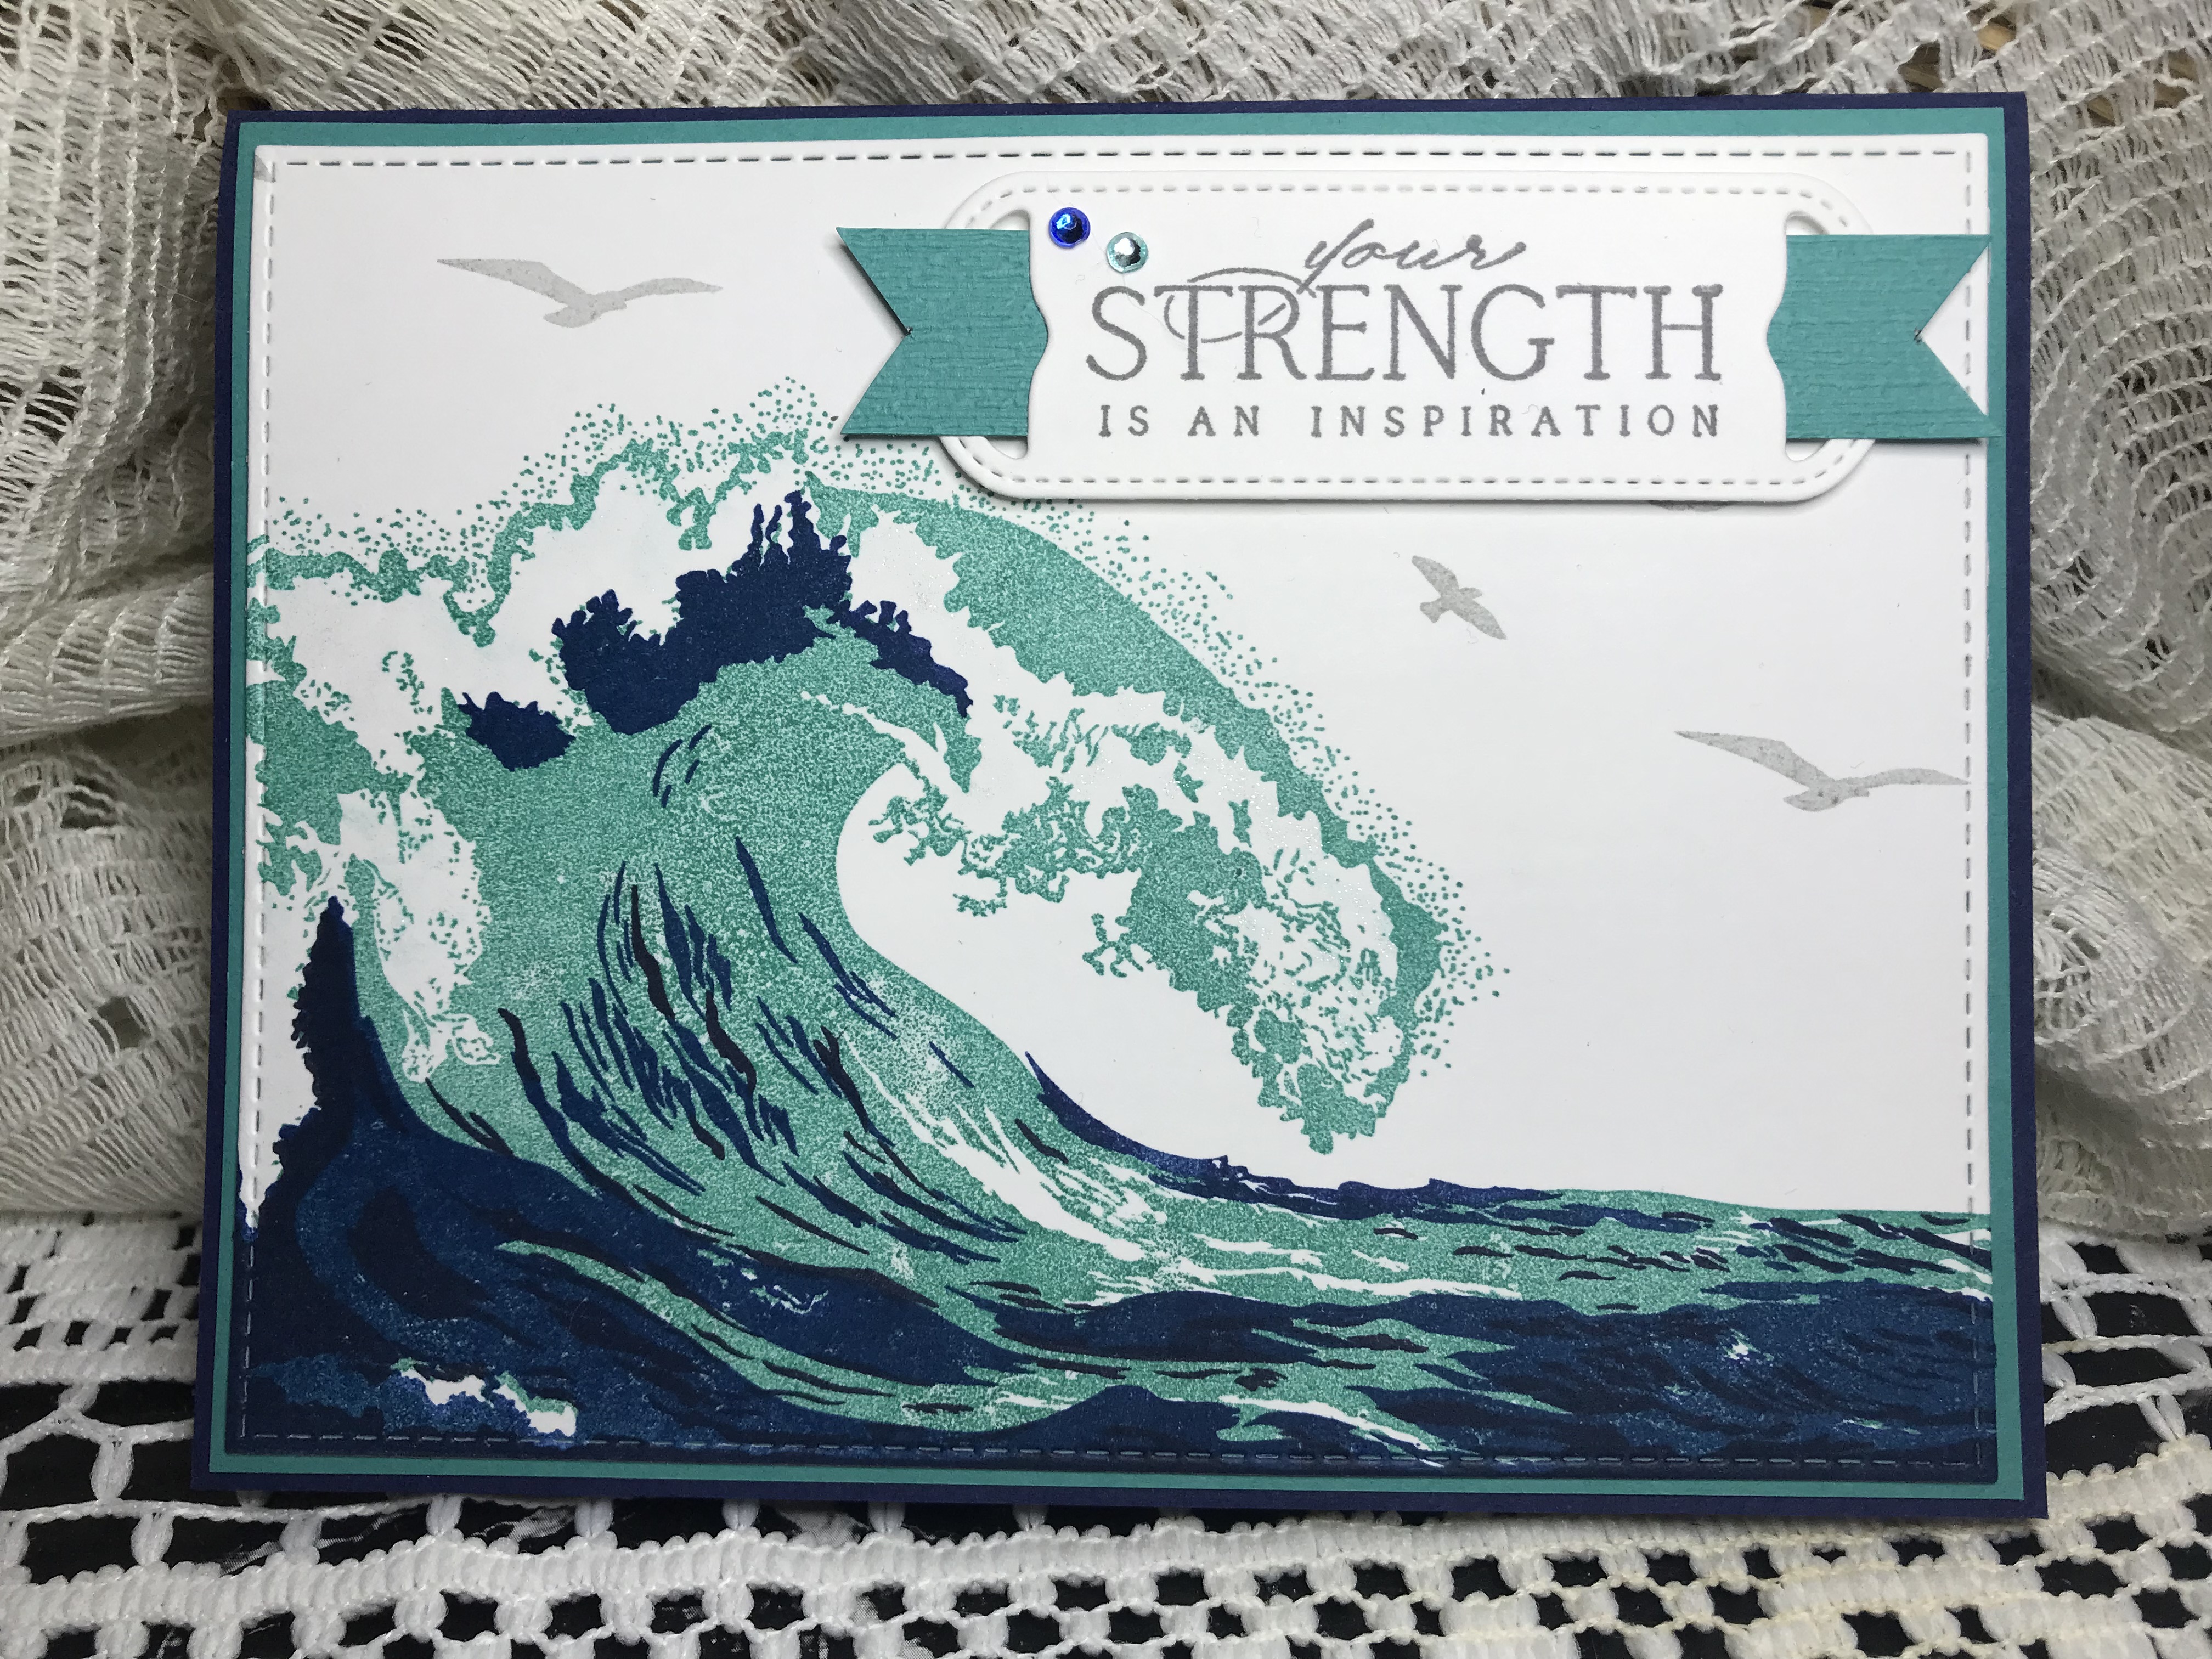
Your Strength is an Inspiration

I love all ocean or beach themed cards. They are perfect for any sentiment and can be used all year long. Here's my latest card that I think will be a perfect sympathy card or note card that can be sent to someone you admire.


This card is so easy to make but looks like you spent hours making and it packs a big punch. Here are the supplies I used to make this card - if you are interested in getting the same supplies, I would be happy to help you with Stampin' Up products - just us the host code provided. These products will be indicated with an SU by the name.

Supplies:
  • Cardstock:
      • Night of Navy (SU) - cut 5 1/2 x 8 1/2 (score at 4 1/4 and fold in half
      • Bermuda Bay (SU) - cut 5 3/8 x 4 1/8 and 5/8 x 3 3/8 for ribbon
      • Basic White (SU) - cut 5 1/2 x 4 /14, 5 3/8 x 4 1/8, and approx. 3 x 1 for tag
  • Stamps:
    • Wave of the Ocean (SU)
    • The Wave (The Ton)
    • By the Sea 1
    • By the Sea 2
  • Inks:
    • Night of Navy (SU)
    • Pacific Point (SU)
    • Bermuda Bay (SU)
    • Smoke Slate (SU)
    • Basic Gray (SU)
    • Wink of Stella
  • Other:
    • Subtle texture embossing folder to create the ribbon
    • Wave of the Ocean die set (SU)
    • Stitched Rectangle die set (My Favorite Things)
    • Crystal rhinestones colored with Copic market B29 and BG13
    • Foam dimensionals (SU)
Instructions
Stamp the front layer first using the 5 1/2 x 4 1/4 size Basic White piece. Stamp the wave from The Ton (three-layer stamp) starting with Bermuda Bay for the first layer; Pacific Point for the 2nd layer and Night of Navy for third layer. Stamp the birds using the By the Sea stamp set in Smokey Slate. Cut the panel with the Stitched Rectangles largest die.

Layer the white layer onto the Bermuda Bay piece which can then can adhered to the Night of Navy card base.

Stamp the sentiment in Basic Gray and die cut using the Wave of the Ocean die set. Emboss the smaller piece of Bermuda Bay and cut fish tails to finish the ends. Thread the piece through the open ends of the sentiment die cut piece. Add foam dimensionals to the sentiment and add to the front of the card. Add Wink of Stella to the white parts of the wave to add a little sparkle and shine.

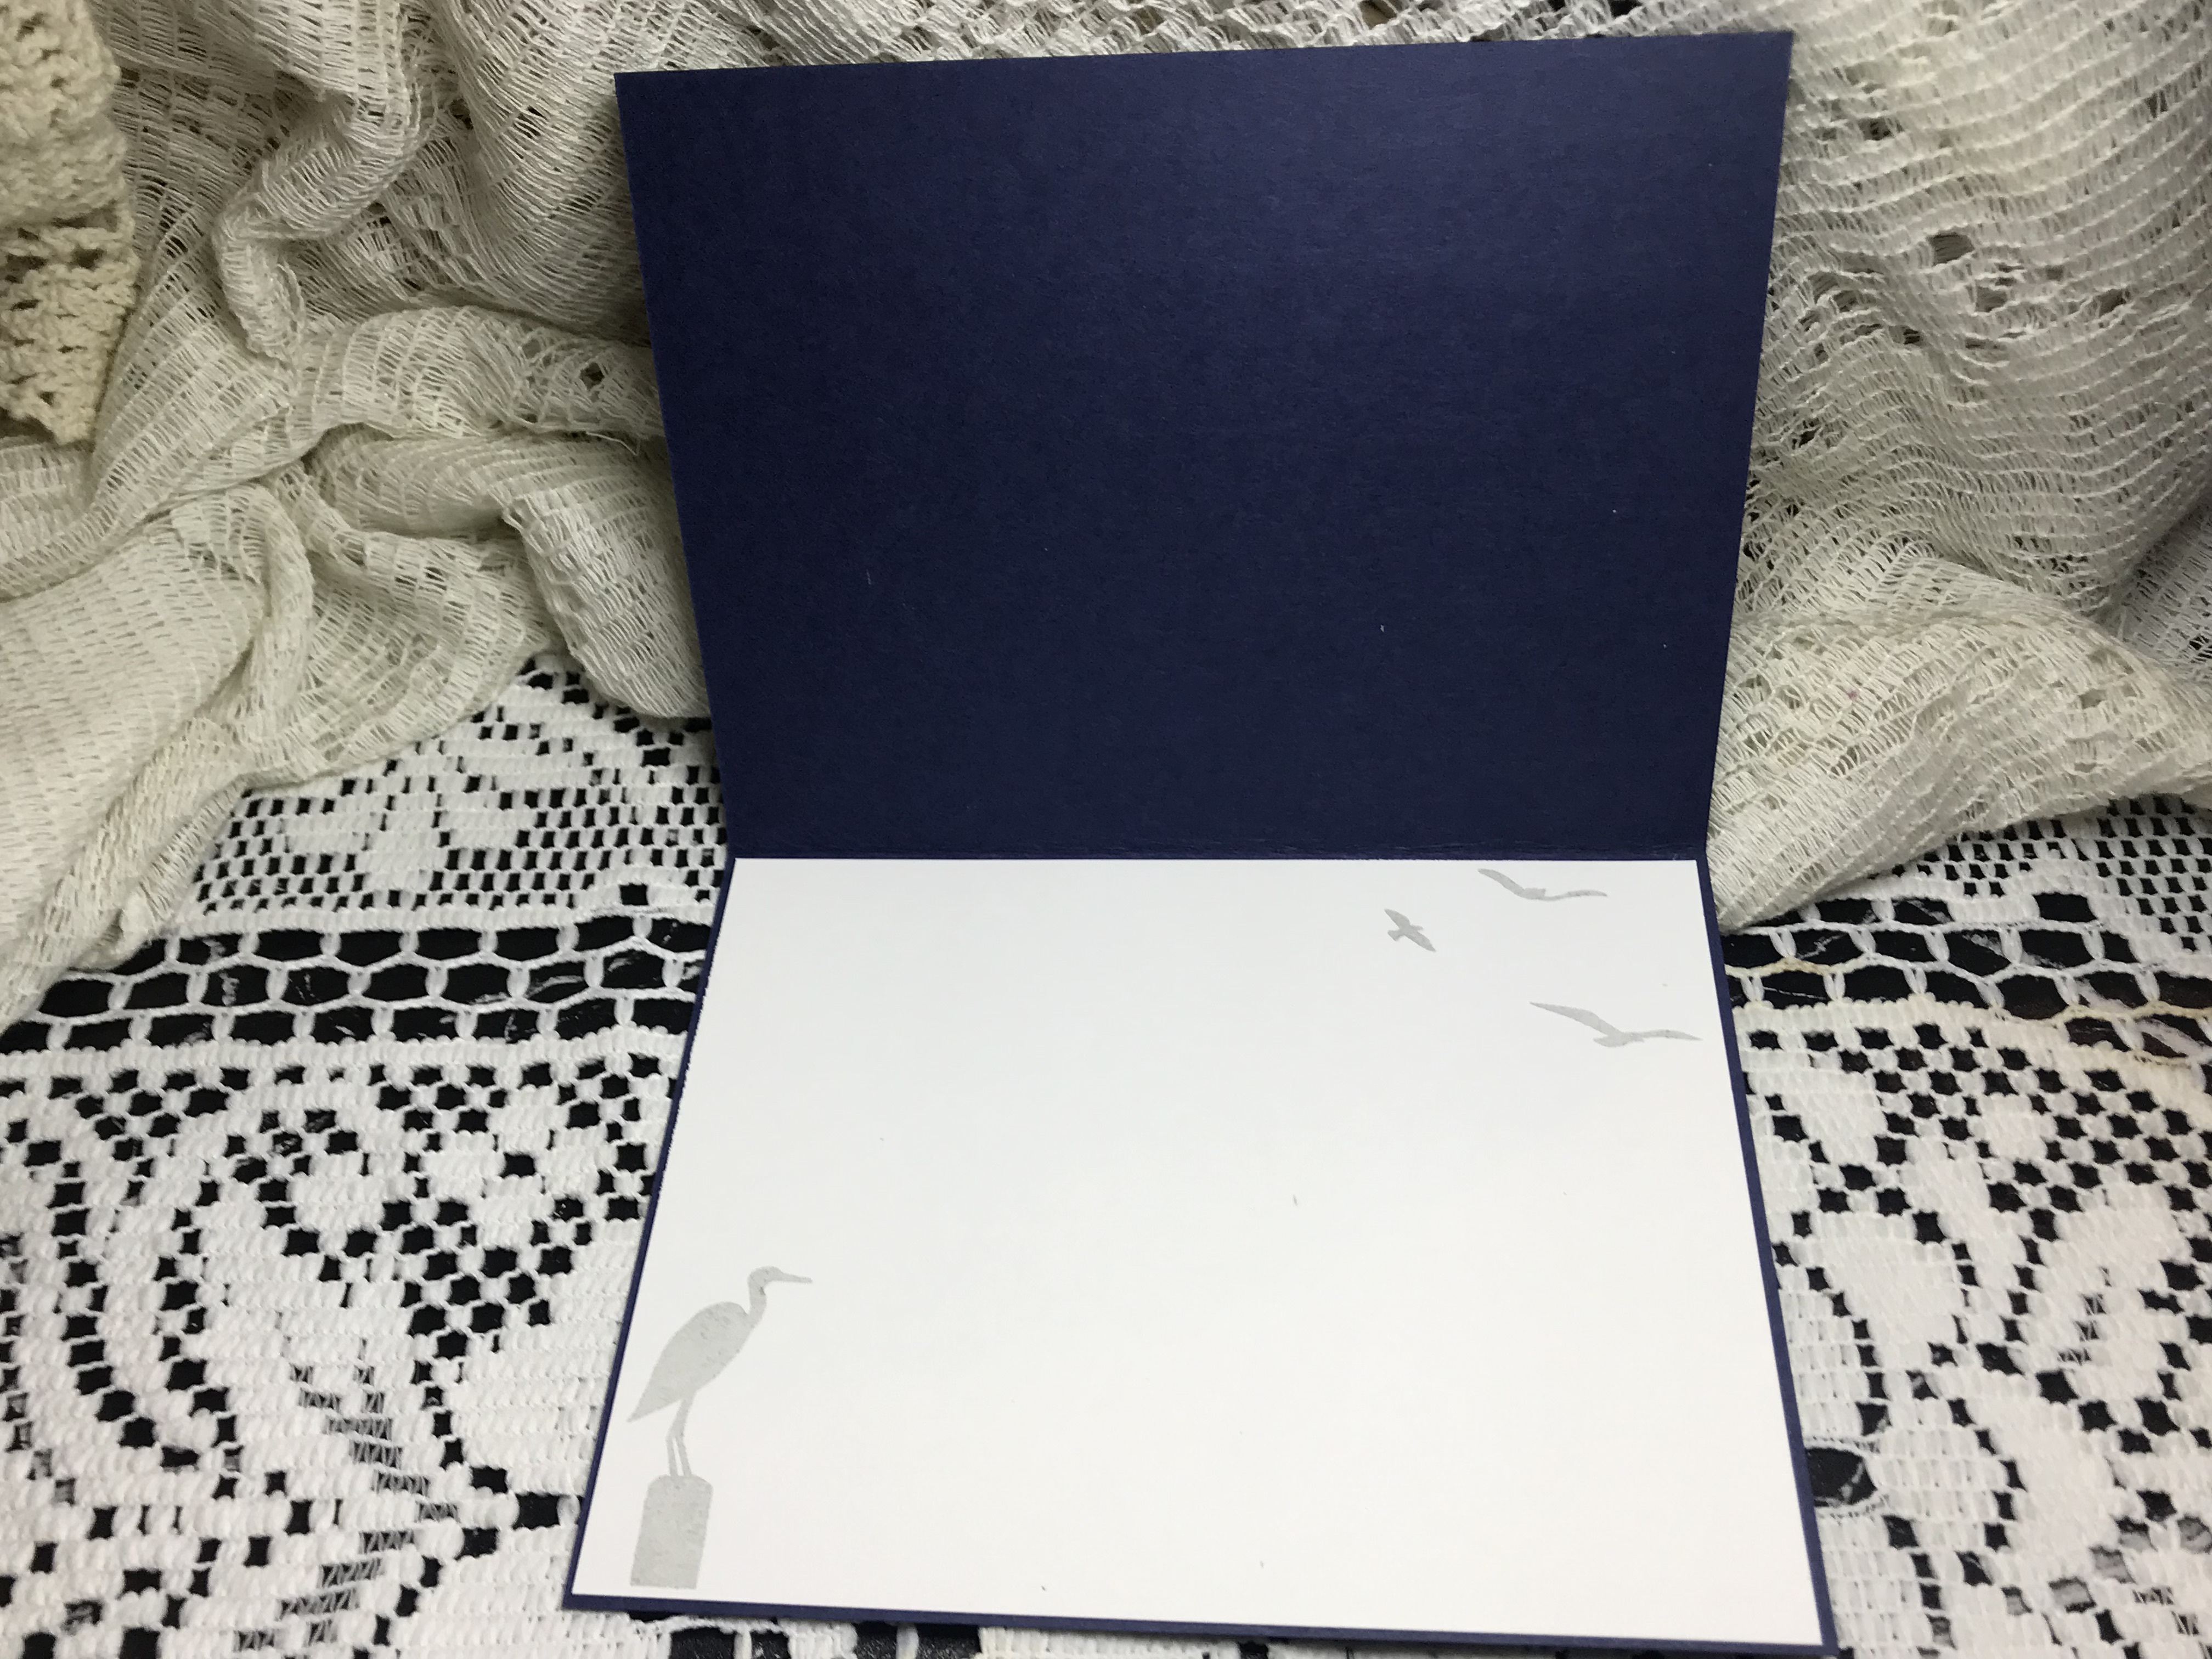
For the inside panel, stamp images from By the Sea in Smokey Slate - use the same stamps on the outside of the envelope.


I just love this card and it was so easy to make. As a reminder, you can order the Stampin' Up products from me use this months host code 4HKYNC94 or by searching for my name Kathie Krawczyk, I would love to assist you with all your Stampin' Up products.

The card is also available on my Etsy shop here.

Thanks so much visiting by blog. Happy crafting!

Kathie K.


Wednesday, March 30, 2022

Asian Crane Screen Card

 Beautiful. Elegant. Classy. These are the comments I have received about this new card. This card is so versatile with sentiments and images that can be used for any occasion. And its easier than it looks.


Below are the materials and supplies I used to make this card. However, use what you have. Tip: pick a designer series or pattern paper that you like and use that for your color inspiration. I used gray, copper and gold for this card.

The finished size when folded is 8 1/2 x 3 1/2 and fits into a standard #9 business envelope. This card will need extra postage if mailed.

Supplies:

  • Cardstock and paper:
    • Base cardstock/Basic Grey - 8 1/2 x 11
    • Top and bottom layer panels - Basic Black - cut 8 - 2 5/8 x 1 1/8
    • Designer/Pattern Paper:
      • Top - cut 4 - 2 1/2 x 1
      • Bottom - cut 4 -  2 1/2 x 1
      • 4th panel - 3 3/4 x 2 1/2
      • Back - cut 3 - 6 1/8 x 2 1/2
    • Back layers - Basic Black - cut 4 - 6 1/4 x 2 5/8
    • Gold Shimmer:
      • 1st and 4th panels - cut 2 - 3 7/8 x 2 5/8
      • Scraps for die cuts
    • Copper Shimmer - 2nd and 3rd panels, cut 2 - 3 7/8 x 2 5/8
    • White:
      • Front: 1st panel - 3 3/4 x 2 1/2, and scrap for sentiment
      • Back: 3rd panel - 6 1/8 x 2 1/2
  • Stamps - I used new and retired sets from Stampin' Up - All Good Things (ret), Bamboo Beauty and Crane of Fortune
  • Ink - Smokey Slate (Stampin' Up)
  • Border Punch
  • Label Punch
  • Dies - Crane of Fortune (Stampin' Up)
  • Copper ribbon
  • Adhesive
  • Bone folder
  • Dimensionals
Instructions:
  1. Score along the 11" side - 2 3/4, 5 1/2 and 8 1/4
  2. Use the border punch on the top edge
  3. Use the label punch along the bottom edge to create the legs
  4. Layer the designer/pattern cardstock pieces to the basic black layers (you should have about a 1/16" border) and one piece of designer/pattern cardstock (3 3/4 x 2 1/2) to one of the gold panels
  5. Layer 1 white panel to gold layer
  6. Stamp words to scrap and punch out with label punch; stamp images in Smokey Slate to the smaller white panels for the front and larger white panel for the back
  7. Layer 2 smaller white panels to copper layers
  8. Layer the larger white panel to black
  9. Adhere the all the layered pieces to the panels as shown in the pictures
  10. Die cut images from gold shimmer and arrange on the first and last panels; pop up the words that were punched out and layer on top of gold die cuts
  11. Tie a bow with copper ribbon and place on last panel.

I hope you give this design a try - its so worth it and your friends and family will love it.

Here's a short video to show you how its works.


If you would like to order any of the Stampin' Products, please use this month's host code: 4HKYNC94

If you would like to purchase this card, it's available here on my Etsy shop - HandmadeByKathieK

Happy Crafting!

Saturday, April 10, 2021

So simple. Huge wow!


This very simple birthday card packs a big punch. The decanter and rocks glasses actually look like they are made from glass. I add texture to the background so the shelf looks like its attached to a stucco-like wall.


Here are the supplies and measurements:
  • Black cardstock: 
    • 4 1/4 x 11, scored at 5 1/2
    • 5/8" x 3 1/2 for sentiment
  • Gray cardstock: 4 1/8 x 5 3/8
  • White card stock: 
    • for the front 4 x 5 3/4
    • for the inside 4 1/8 x 5 3/8
    • 1/4 sheet for die cuts of decanter and glasses
    • 1/2" x 3 3/8 for sentiment
  • Wood grain cardstock or paper scraps for shelf (use dies and cut two, attach together to make shelf)
  • Momento Black ink pad
  • Light gray ink pad (I used Smokey Slate from Stampin' Up)
  • Copic markers
  • Nuvo Crystal Glaze for the glass look
  • Textured embossing folder
  • foam dimensionals or tape
  • Glue dots
First, stamp and color the decanter and glasses. Once the the ink has dried, cover each pieces with the thin coat of the crystal glaze. This should dry for 24 hours for the best result. I usually make multiple sets at one time so they are ready when I need a birthday card.

Using the embossing folder, emboss the small white cardstock panel which can then be attached to the gray panel. Layer the small white strip after stamping the sentiment onto the small black strip. This can be attached to the embossed layer in the bottom right-hand corner. 

Once the glaze has dried, cut out each piece and mold them to the shape you like. I like making the glasses curve a bit and bend the decanter on the corners to give it a 3D look. Add foam tape to the back of the shelf and place on the left above the sentiment.


For the glass pieces, I like the illusion that the pieces are sitting on the shelf away from the wall. Here's how you do that:
  • Place 2 foam pieces (double thickness) at the top of the decanter and attach glue dots to the bottom outside corners; attach the glue dots to the shelf keeping the decanter bent and attach the foam piece to the white background.
  • For the glasses, the first one should have one layer of foam adhesive at the top and glue dots at the bottom; the second glass, attach a double layer of foam adhesive at the top and a single layer at the bottom; both glasses should be attached to the shelf and the white background.
And lastly, stamp an image of the glass on the envelope and inside panel in gray ink.


That's all there is to this card. The textured background and raised elements really give this card a huge wow factor. I hope you give it a try.

Cheers!


Friday, March 26, 2021

Double Z-fold Horses Birthday Card


This is a super fun birthday for all ages. The double Z-fold provides a pasture scene with horses behind a fence line. The fence make the second the Z-fold. These cards provide huge impact with very little efforts.

Here's what you need:
  • Red/cherry cardstock cut 11 x 4 1/4, score at 2 3/4" and 5 1/2"
  • White cardstock - 2 panels 4 1/8 x 2 5/8 and 1 panel 4 1/8 x 5 3/8
  • White cardstock scrap for message panel
  • Crumb cake/tan cardstock for fence dies
  • 2 green colors for the grass dies
  • Small scrap for cowboy hat
  • Fence and grass dies - Spellbinders is pictured
  • Banner dies
  • Let it Ride stamp set - Stampin' Up
  • Hardwood background stamp - Stampin' Up
  • Happy birthday stamp
  • Natural Jute for rope
  • Ink pads - green, blue and Copic friendly black
  • Copic markers to color horses


To form the fence line into a z-fold, attach the fence pieces (you'll need 3 plus one post) using extra pieces in between the sections. Once all of the fence has bee assembled, score at 5 1/2" and 8 1/4" and fold. These folds will be the opposite of those on the base.

To create the scene, stamps the horses and trees first where you want them. Mask the horses and then sponge on green ink to look like the grass area and very light blue to make the sky. Unmask the horses and color with Copic markers. Attached the scene panels to the red base. 

With the card folded, glue down the first and last sections to the card base leaving the middle section unattached. Glue down accessories like the cowboy hat and lasso. I also glue down a small message panel.


I hope you give this double Z-fold card a try.

Happy card making!
Kathie K.


Monday, March 22, 2021

Peacock Z Fold Birthday Card


This peacock birthday definitely has the wow factor. The elegant foil cardstock combined with the fun, Z-fold will wow any recipient. And its so easy to make.

The card expands to 11" and folds to an A2 size (5 1/2 x 4 1/4) and fits nicely into a standard envelope. I chose a blue color pallet but any color combination will work great. Here's what you'll need:
  • Blue cardstock cut to 11 x 4 1/4; score at 2 3/4" and 5 1/2"
  • Designer paper with a blue foil design - cut 2 panels 4 1/8 x 2 5/8
  • White cardstock for floral oval, sentiment tag and hexagon dies (approximately 4 1/4 x 5 1/2)
    • Cut 2 hexagons; trim each one to 2 1/2" long
  • Blue, gold and light teal foil/mirror cardstock - enough to cut feathers and peacock:
    • Blue - cut peacock, large feather, medium feather
    • Gold - cut triple feather, medium feather, small swirl feather
    • Teal - cut triple feather, and small swirl feather
  • Anno Griffin Peacock and Feathers die set
  • Spellbinders Floral Oval die set
  • Stampin' Up Fancy Frames die set
  • Teal rhinestones (not pictured)
  • Happy birthday stamp
  • Peacock feather stamp for envelope (Hero Arts Color Layering Peacock)
Instructions:
  1. Make the Z fold using the score lines
  2. Attach designer paper to first two panels
  3. Place the large oval die white cut in center of large blue panel and adhere; attach large blue feather along right side of oval
  4. Attach the cut hexagon die cuts lining up the cut ends at the fold; this will become the base that the peacock and feathers will attach to.
  5. Build the peacock by attaching the feathers to the back of the blue peacock; start with the gold and teal triple feathers; add the medium blue feather, gold and teal swirl feather and finish with the gold medium feather towards the bottom. Tip: Glue dots work great for attaching the feathers; make sure the feathers do not hang off the card base when folded.
  6. Using dimensionals, adhere peacock to the front panel.
  7. To finish off the card, attach small teal rhinestones to the peacock for the eye and add to sentiment die cut.


I hope you give this card a try. It so much easier than looks and will be sure to impress.

Happy card making!
Kathie K.


Friday, May 15, 2020

Teepee or Pyramid Birthday Card


I really like making this style of card. I like being able to decorate three sides of the card. These cards have a huge impact and are really easy to make. I have tried a couple different ways to make to these cards and here is my favorite.

You will need:
  • 3 - 4" squares of cardstock for the base
  • 2 - 3 7/8" squares decorative paper for the outside
  • 1 - 3 7/8" square decorative paper for the inside
  • 1 - 3 7/8" square white cardstock - inside note and signature panel
  • Embellishments - tags, die cuts, etc

Constructing the card:
  1. Score the base squares in half on the diagonal; fold and burnish
  2. Cut decorative squares and inside panel in half on the diagonal - you will have triangles
  3. To for the teepee or pyramid, place one square on work surface with the score line vertical; the piece will look like a diamond. Place the other base squares on each side of the diamond matching the top points and the edge of the square to the score line of the diamond. Glue squares together.
  4. Arrange the triangles to your liking and glue in place on the base - outside and inside
  5. To close the flap on the teepee, you can use Velcro dots or my preference is to cut a small slit and insert the tip of the flap to close. Do this measure up the from the tip of the base 2 1/8" and then cut a 3/4" slit horizontally starting at the score line. You will need to cut through the decorative layers and the base cardstock. Insert the tip of the flap and your card will stand up on its own.
  6. Use embellishments to decorate. I like to place a die cut over the close slit to hide.


When the card is unfolded, it will fit in a standard envelope. The card pictured actually fits in a larger envelope due to the embellishments.


I hope you give this card a try. If you would like to purchase this card, check out my shop here.

The products I used are from Stampin' Up and will be discontinued on June 2, 2020. If you would like to order, the products are listed below. Please use this Host Code when ordering: CGCB6Z76

Free as Bird stamp and die set bundle - #151123
Bird Ballad Designer paper - #149592

Happy stamping.
Kathie K.

Sunday, August 26, 2018

Handmade flocked cards

Happy Sunday,

I have been reorganizing my craft supplies and found an oldie but goody - flocking. I completely forgot about this awesome product. It adds a touch of texture and dimension to any project. You can use a lot or just little. It can be used as a main color or as an embellishment. A little goes a long way so its also a good investment.

To use, you add flocking like you would glitter. Place a small amount of glue in the area you want flocked, and then add the flocking.  Shake off the excess back into the container. Its that easy!

Here are a couple of projects where I used just touch to add something special to the cards. The first one is a teddy bear new baby card. I added the flocking to the bear's feet.

For my next project, I used the flocking to highlight a specific area - the dog's ear. The die cut is embossed to show the dog's features. I used the embossing lines as a guide to place the glue. Again, this small amount of flocking added texture and extra dimension to this sweet card.


Flocking has many other uses. Here are just few more ideas:

  • snow - on trees or outdoor scenes
  • use to color scarfs, hats and sweaters instead of markers or pencils
  • can be used as sand in beach scenes or tree bark
Flocking comes in many different colors so the uses are endless. If you want flocking for specific stamped image, use Versamark with Heat 'n Stick powder. You apply the Heat 'n Stick powder just like embossing powder and heat. Once heated, the powder stays sticky. Apply the flocking and it will only stick to the embossed areas. Shake off the rest.

I hope you look at flocking a bit differently now. I just love using it.

Happy stamping!
Kathie K.


Friday, August 10, 2018

Layering die cuts

Hello fellow stampers and card makers,

I hope you are off to good start to your weekend! Here's a card that I really enjoyed making. And it's almost all die cuts.


I first cut all the cardstock to the size of card I want and die cut the images. The base of the card is made from black cardstock and the background is made from teal. This layer is dry embossed using a honeycomb pattern. The cats are cut from three different colors - black, tan, and rust. The labels are cut from light teal or aqua, black and white.


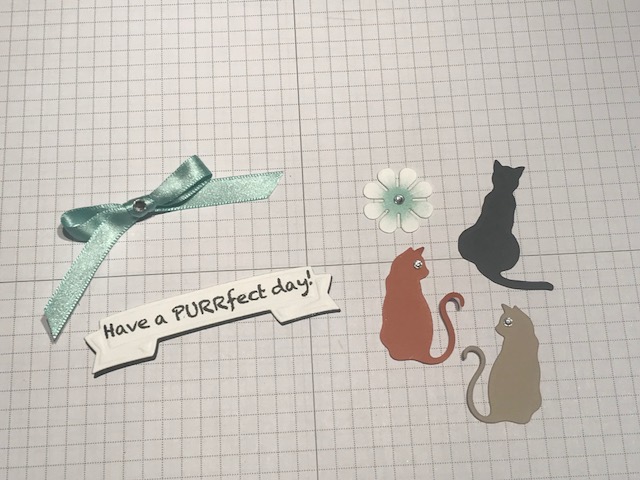
I then made the embellishments. I used an aqua satin ribbon with a crystal rhinestones that will be attached to the main focal point. The sentiment is stamped in black on the white banner label. To give it added dimension, a black banner is also cut and adhered slightly offset to make a shadow. I also added rhinestones as eyes to the cats and as the center of the flower (used a sponge dauber to color the center of the white flower).


To make the focal point of the card, I cut the aqua colored labels in half as shown below. The aqua labels are the same size as the white. I adhered each end of the longer label under the black label. Then I adhered the smaller aqua labels under the white one with the aqua edge just visible. Then I attached that piece on top of the black label. Layered on the cat die cuts so the tails just touch (almost looks like a heart). Then attach the label and the flower, and the focal point is done.


I attached the dry embossed background piece to the card base. Then added the layered label focal point and the sentiment. I also added a white piece of cardstock to the inside of the card and stamped paw prints in the bottom corners as well on the envelope.


This makes a great birthday card for those cat lovers in your life. I hope you give die layering a try to make focal points for your creations.

Happy stamping!

Kathie K.

Sunday, August 5, 2018

Vellum Cards

Hello fellow stampers and card makers,

I hope everyone is having a wonderful week. It's hard to believe it's August already. Like most of you, I love using vellum when making cards. I think it adds a little something extra - don't you agree. Here are a few of my favorite cards using vellum.

The first card is monochromatic with just one small pop of color, or in this case black, along with the peach and vellum cardstock. The flowers and leaves are created with Versamark ink and white embossing powder. Don't be afraid of embossing on vellum - you just need to be a little more careful about how much heat you are applying. I then used the matching dies to cut them out once they cooled. I then layered the flowers around the corners and added the sentiment. For me the main flower focal point was a little too transparent so that particular flower has two layers of embossed vellum.


The next example uses the same embossing technique but with a different color scheme and sentiment. But this time I added some color to the back of the embossed image. I think it gives it a watercolor look. This technique is super easy and you don't have to worry about staying inside the lines.


For this next card, I used the vellum for my sentiment - in this case, Thank You. I like that you can still see the pretty trees through the stamped sentiment. You can use any kind of black ink that you have.  I do find that Stazon works the best. You do need to let the ink the dry before handling or it will smudge.


The challenge with using vellum is the adhesive shows through. And no one wants to see that. For the first two cards, I strategically placed the adhesive in densely embossed areas to cover. For the third card, I used copper brads to attach the vellum to the card. They serve two purposes - an embellishment and adhesive.

I hope you give vellum a try if you haven't already. I just love the look and I think you will too.

Happy stamping!

Kathie K.

Airplane easel birthday card

  Crafting Joy: A Beautifully Designed Handmade Birthday Card Birthdays are a celebration of life, love, and the joy of making memories. Wha...